How-to: Installing Crystal Reports 2013
Introduction
This document provides a step-by-step guide to install
Crystal Reports 2013. Crystal Reports 2013 is supported as of product update
411.
Description
To install Crystal Reports 2013
Note: You will need to have the Administrator role to install
Crystal Reports 2013.
1. Insert the CD in the CD-ROM and double-click Setup.exe.
The following screen will be displayed:
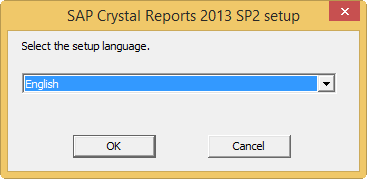
2. Select the setup language. The following screens of the
wizard will be displayed in the selected language. Click OK to launch
the SAP Crystal Reports 2013 SP2 Setup screen, as displayed in the
following screen:
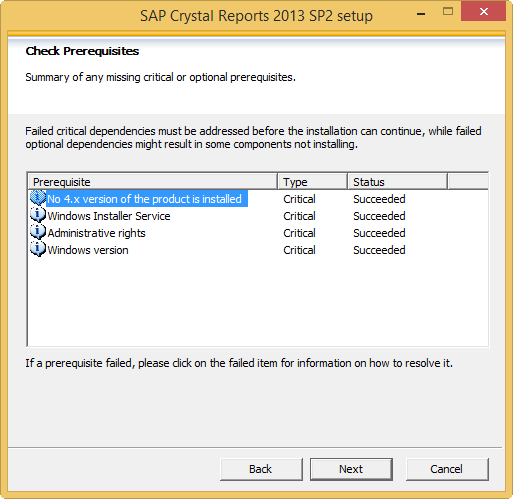
3. In this screen, a check for the installation
prerequisites is performed. When all checks are successfully completed, click Next
to continue. You will see the following screen:
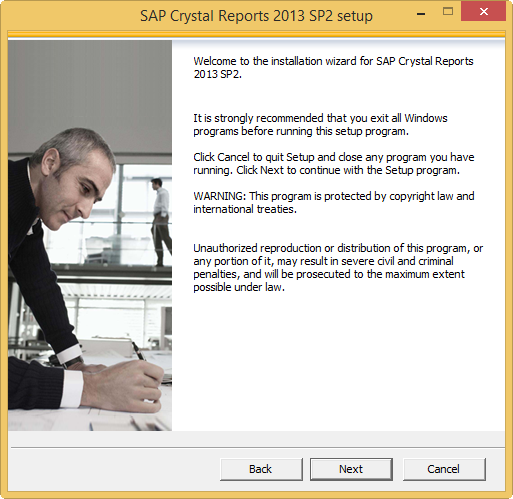
4. Click Next again.
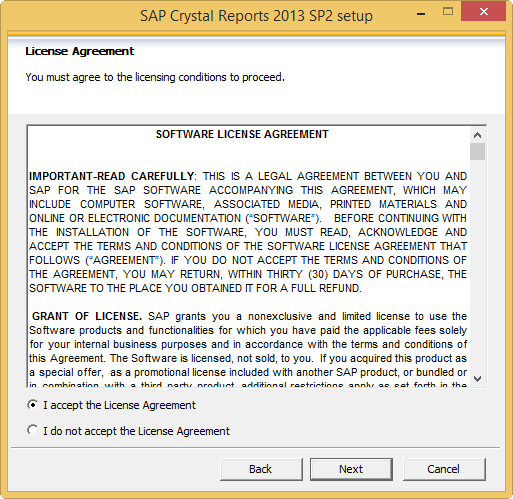
5. Select I accept the License Agreement and click Next
to proceed with the installation. The following screen is displayed:
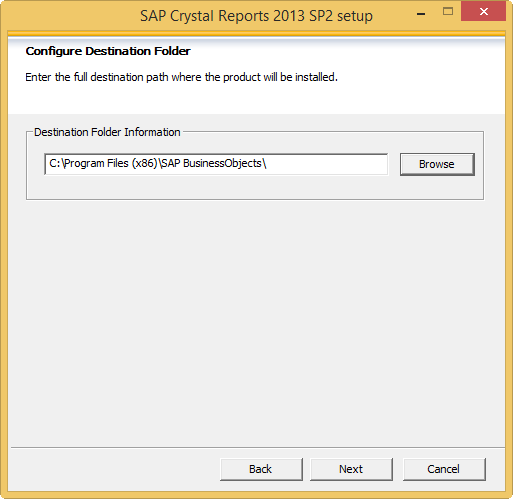
6. Type a destination folder to install Crystal Reports 2013
to the defined directory. The default directory for Crystal Reports 2013 is C:\Program
Files (x86)\SAP BusinessObjects\.
7. Click Next. The following screen is displayed:
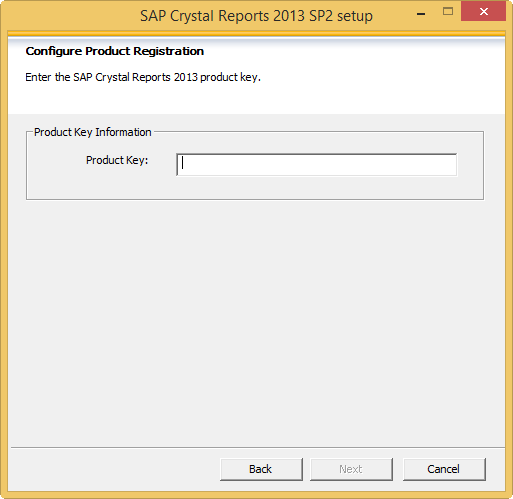
8. Type the product key at the Product key field. You
can obtain the product key from the Crystal Reports software DVD that you have
purchased.
9. Click Next. The following screen is displayed:
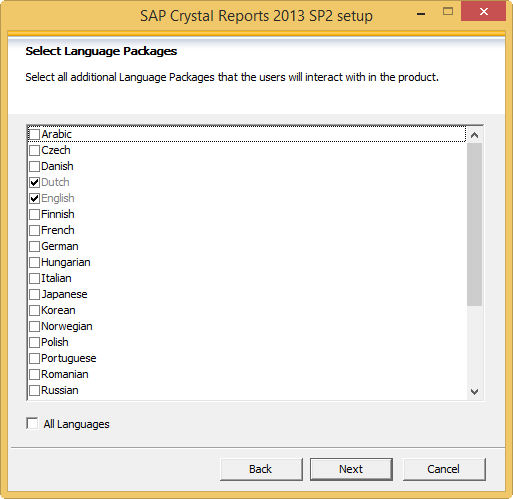
10. Select the preferred language packages, and then click Next.
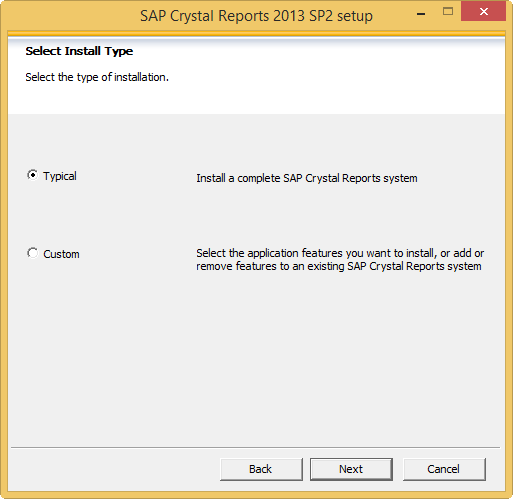
11. Select one of the following installation types:
·
Typical — Select this option to install the most common
application features.
·
Custom — Select this option to customize the application
features to be installed.
Note: When you select Custom, additional
screens will be displayed in the wizard where you can define which components
you want to install. This document describes the Typical installation,
therefore the additional screens will not be described in this document.
12. Click Next.
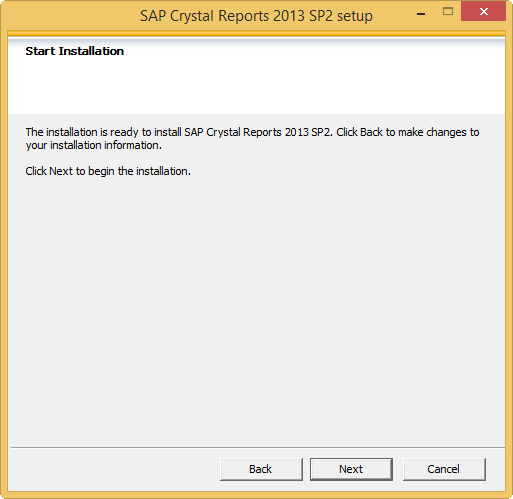
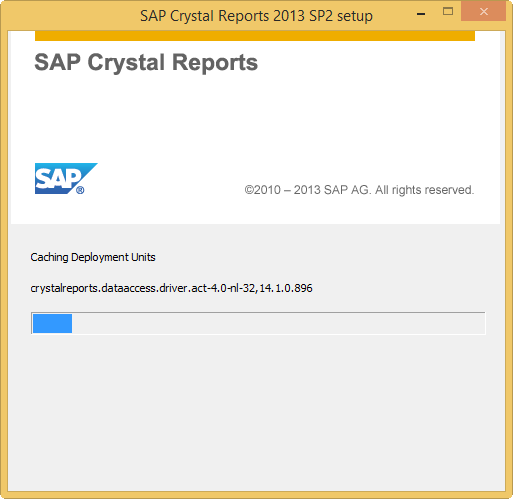
13. Click Next to begin the installation. The
following screen displays the progress of the installation:
14. Once completed, the following screen will be displayed:
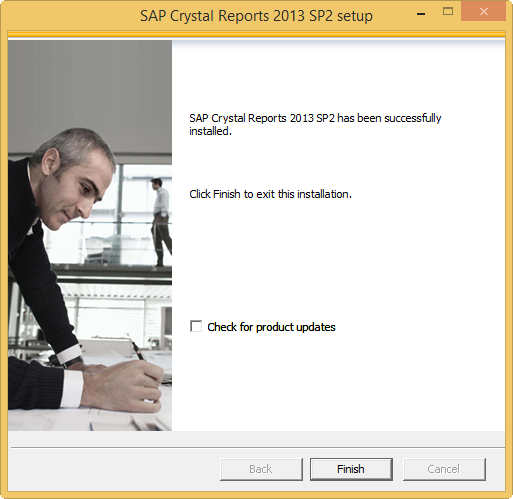
15. Click Finish to close the screen.
Related documents
| Main Category: |
Support Product Know How |
Document Type: |
Online help main |
| Category: |
On-line help files |
Security level: |
All - 0 |
| Sub category: |
Details |
Document ID: |
26.872.820 |
| Assortment: |
Exact Globe+
|
Date: |
26-09-2022 |
| Release: |
411SP5 |
Attachment: |
|
| Disclaimer |