Introduction
At this screen, you can upload up to 10 files as document attachments or images at once to Exact Synergy Enterprise. This functionality helps you to reduce data entry and thus, saves time in uploading.
Menu path
Documents/Entry/Entry/Bulk Upload
Roles & rights
All users with role the Professional role license type are able to perform the bulk uploading process. Users with the CRM role can access the bulk uploading screens only by pasting the URLs of the wizard screens at the address bar.
For more details on what you can do with function rights or levels, go to System/Setup/Security/Function rights, select the required module, and then click on the relevant ID. To find out the functions you can perform with a particular role, go to System/Setup/Security/Roles, type in the description, click Refresh, and then click the required link under the Role column.
Button
The buttons are explained in the relevant steps below.
Description
The process of uploading files in bulk goes through four steps. These steps are:
1. Step One: Selecting bulk upload type.
2. Step Two: Selecting files to be uploaded.
3. Step Three: Defining attributes.
4. Step Four: Viewing the results of the bulk uploading process.

The first step of the bulk uploading process is to specify whether to upload documents or images.
Upload document attachments
Click this to upload documents to Exact Synergy Enterprise and proceed to Step Two.
Publish images
Click this to upload images to Exact Synergy Enterprise and proceed to Step Two.
Button
Cancel
Click this to cancel the bulk uploading process. A message “Are you sure you want to cancel?” is displayed. Click Yes to exit the wizard or No to close the message.

The second step of the bulk uploading process is to select the files to be uploaded. You can select up to 10 files to be uploaded at one time. If you are uploading documents, one document will be created in Exact Synergy Enterprise for each selected file and it will be uploaded as an attachment. However, if you are uploading images, only one document will be created in Exact Synergy Enterprise for all the selected files and they will be published in the body of the document.
Note: If you have selected Publish images at Step One, the screen differs slightly from the above in terms of the instructions on the screen.
Browse
Click this to browse for and select the files to be uploaded. You can remove the selected files by clicking  next to the file.
Button
Start over
Click this to return to Step One.
Continue
Click this to proceed to Step Three.
Cancel
Click this to cancel the bulk uploading process. A message “Are you sure you want to cancel?” is displayed. Click Yes to exit the wizard or No to close the message.
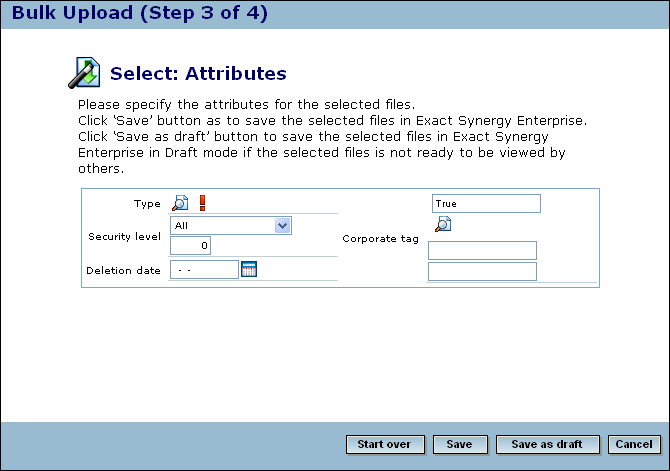
The third step of the bulk uploading process is to define the attributes of the document(s) to be created in Exact Synergy Enterprise such as the type, security level, and language of the document. The fields available are dependent on the settings defined for the document type. For more information on how to define the attributes, see Creating and Modifying Documents.
If you have selected Upload document attachments at Step One, the Subject field will not be available for you to fill in. Instead, the subject of the document will follow the name of the selected file excluding the extension. If you have selected Publish images at Step One, the Subject field will be available for you to fill in the subject of the document.
Button
Start over
Click this to return to Step One.
Save
Click this to save the documents to Exact Synergy Enterprise and proceed to Step Four.
Save as draft
Click this to save the documents in Draft status to Exact Synergy Enterprise and proceed to Step Four.
Cancel
Click this to cancel the bulk uploading process. A message “Are you sure you want to cancel?” is displayed. Click Yes to exit the wizard or No to close the message.
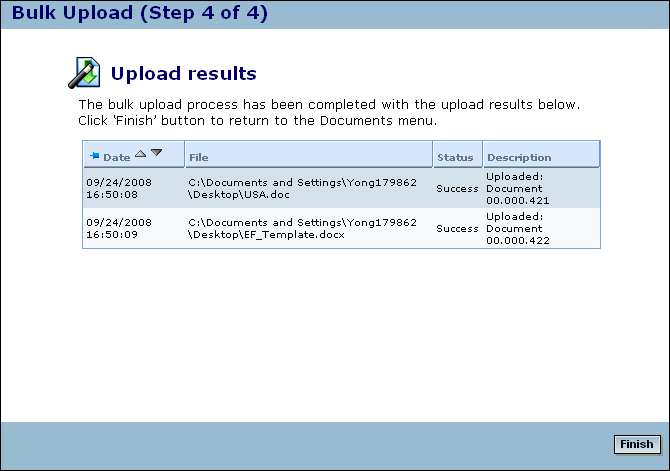
The fourth step of the bulk uploading process displays the results of the uploading process.
 Date
Date
This column displays the date and time when the uploading of the file is completed.
File
This column displays the physical location of the file.
Status
This column displays the status of the uploading process for each file that was uploaded:
- Success — This indicates that the file has been uploaded successfully.
- Fail — This indicates that the file has not been uploaded successfully.
Description
If a file is uploaded successfully, this column displays the ID of the document created in Exact Synergy Enterprise.
Button
Finish
Click this to complete the bulk uploading process and exit.
Related document