How-to: Creating application ID in Microsoft Azure for Synergy Office Integration (SOI) with new Microsoft Outlook
Introduction
This document provides the guide to creating an application ID that will be used in the Synergy Office Integration (SOI) for the new Microsoft Outlook. Ensure the following steps are completed before configuring SOI to the new Outlook.
How do I create an application ID in Microsoft Azure?
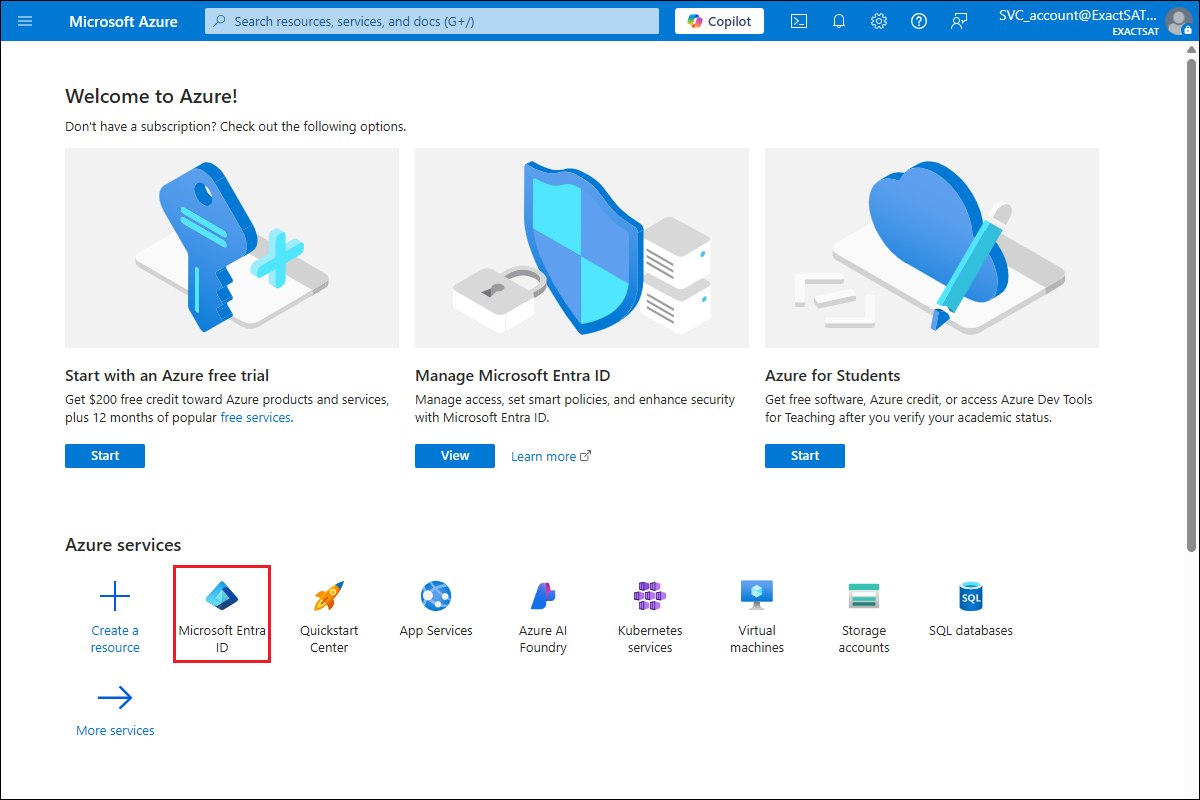
- Go to https://portal.azure.com.
- In the Azure services section, click Microsoft Entra ID.
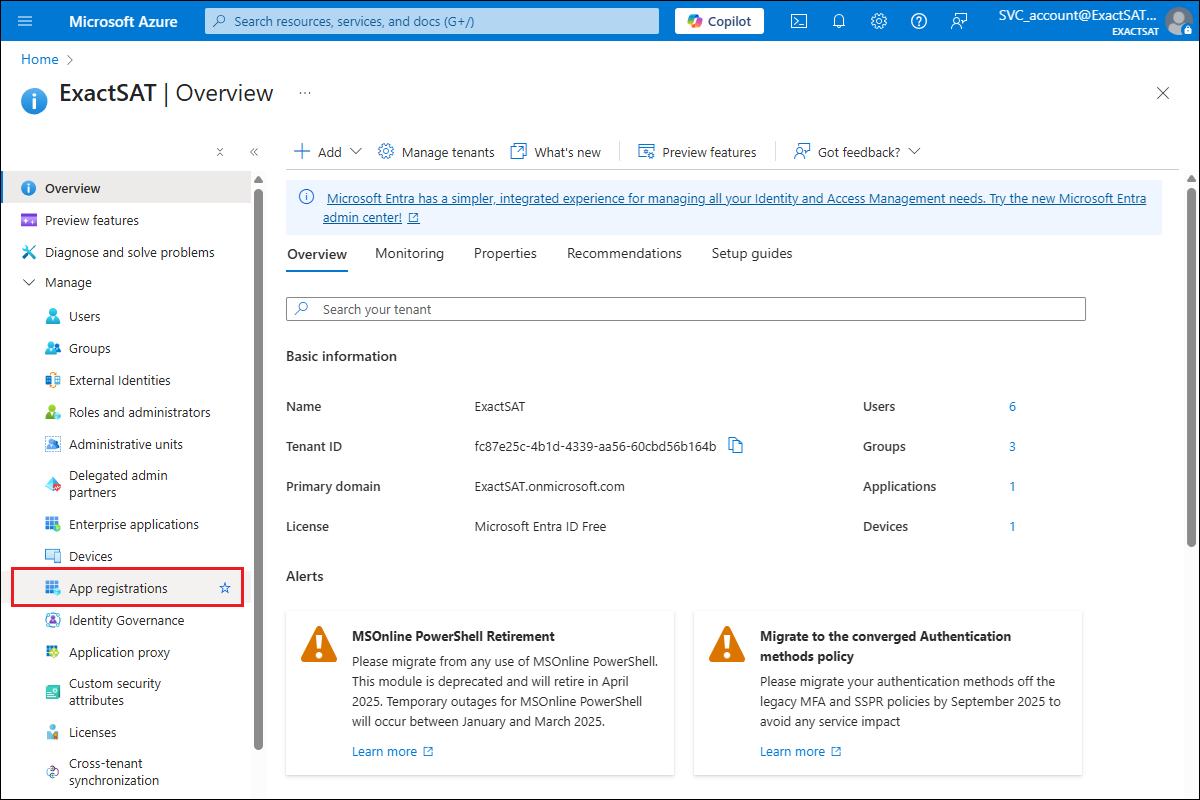
- On the left panel, click App registrations.
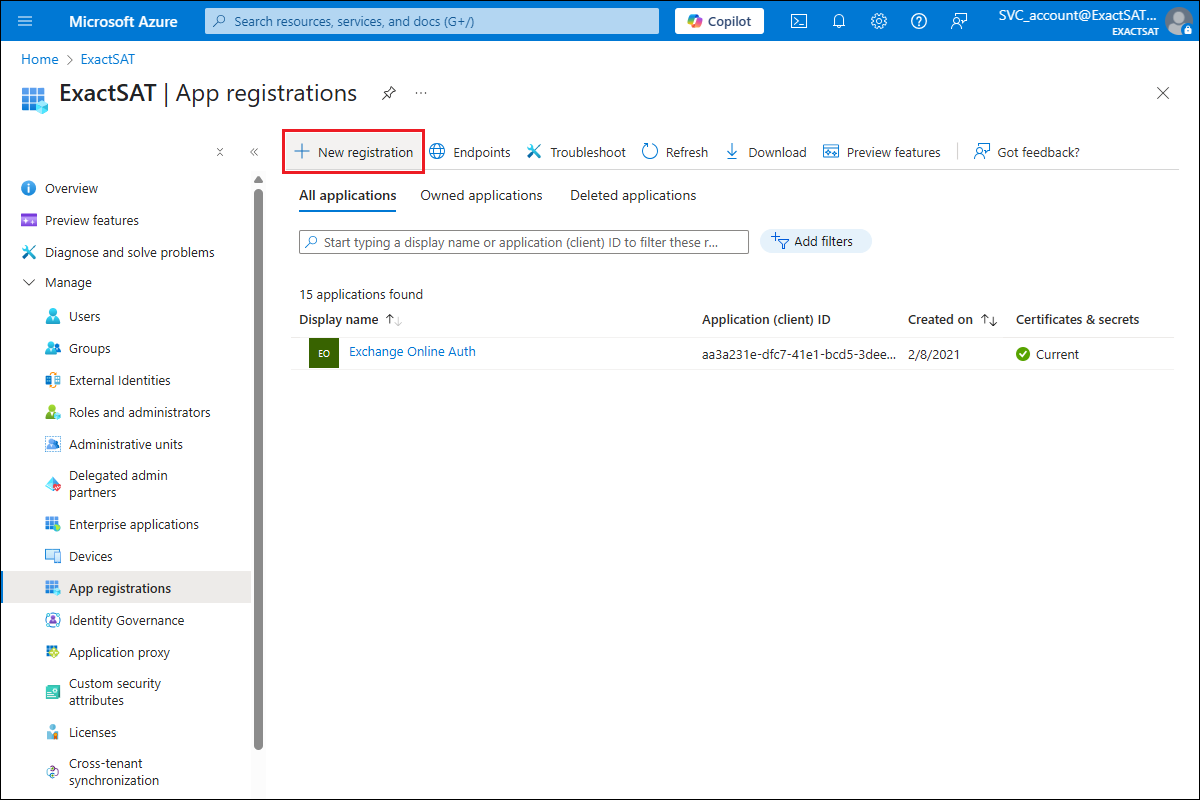
- Click + New registration.
- On the Register an application page, define the name.
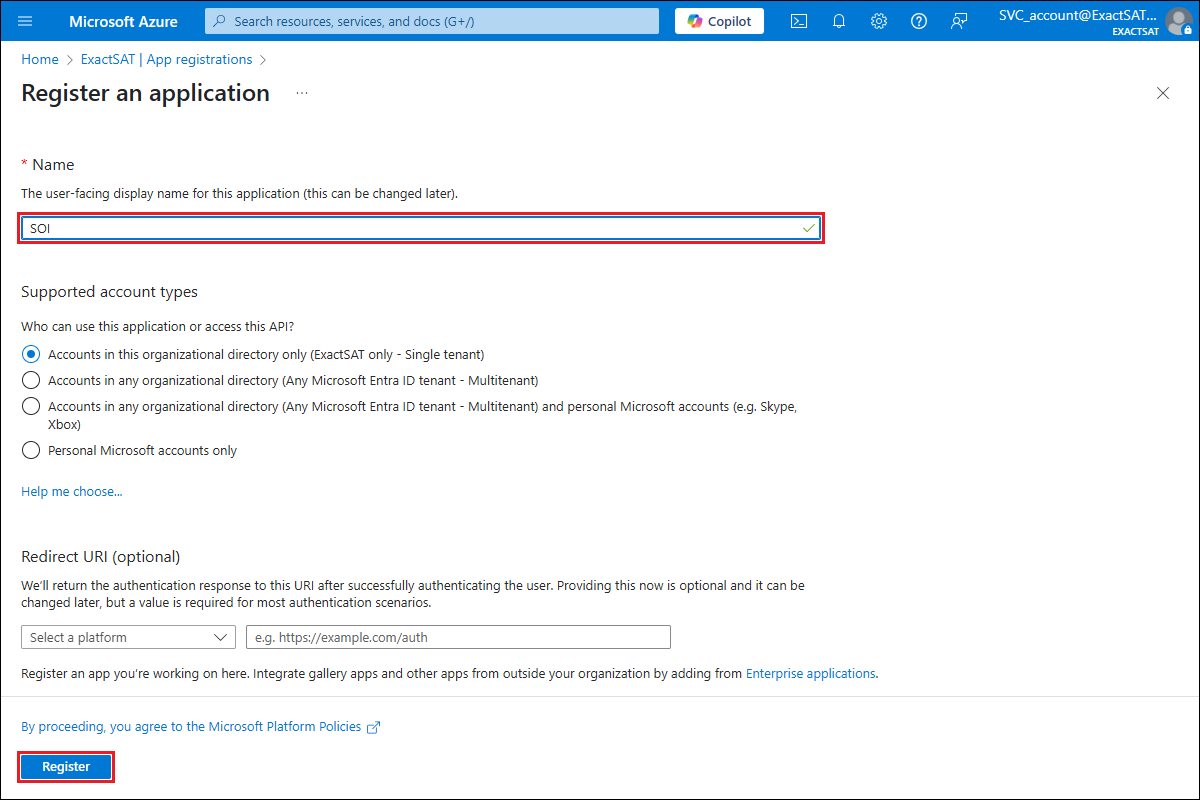
- Next, click Register.
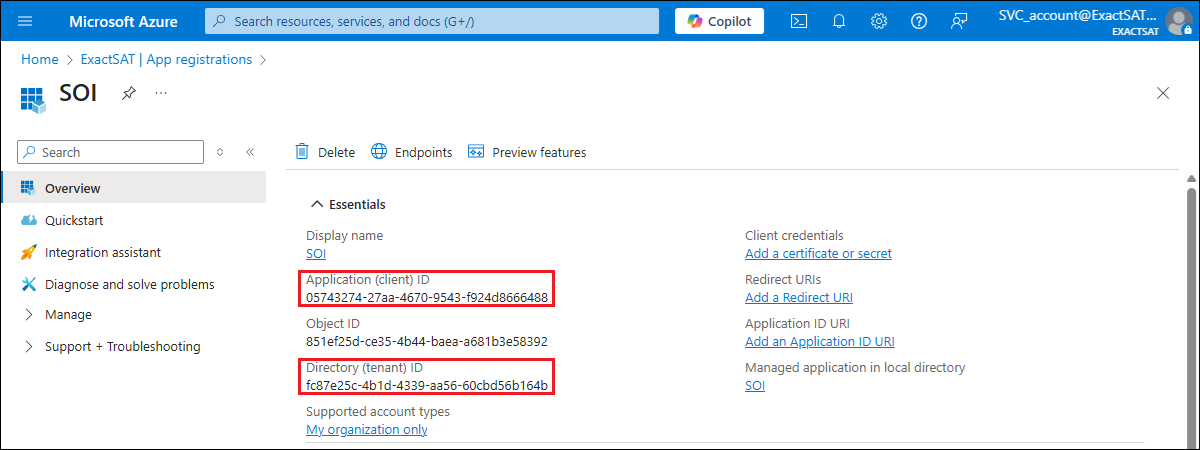
- The application and directory IDs will then be displayed under the Essentials section.
How do I obtain the application ID, tenant ID and client secret to be used in the related Exact solutions?
- After the above steps have been completed, the Overview screen is displayed with Application (client) ID and Directory (tenant) ID fields under the Essentials section.
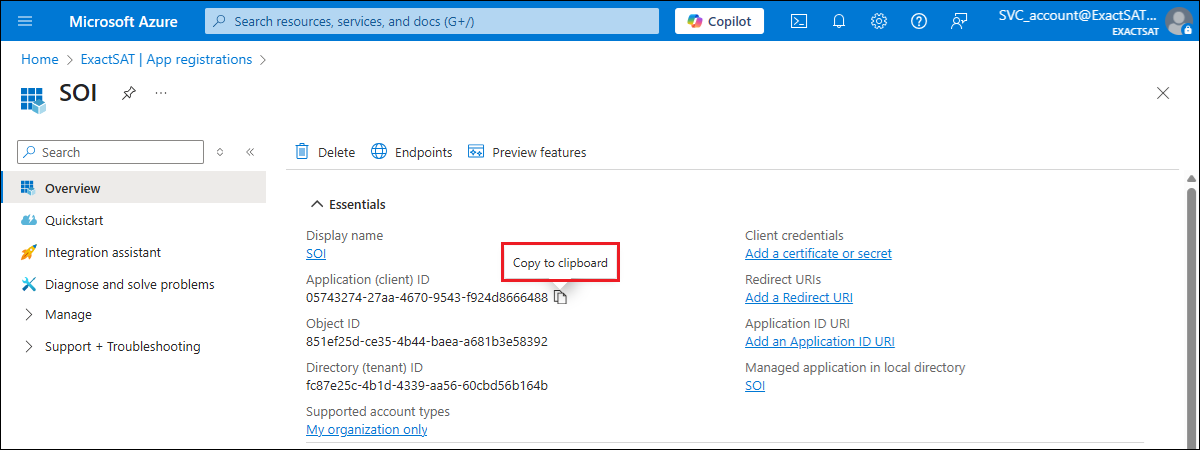
- Click the Copy icon to copy the IDs to the respective fields in HRM: Settings.
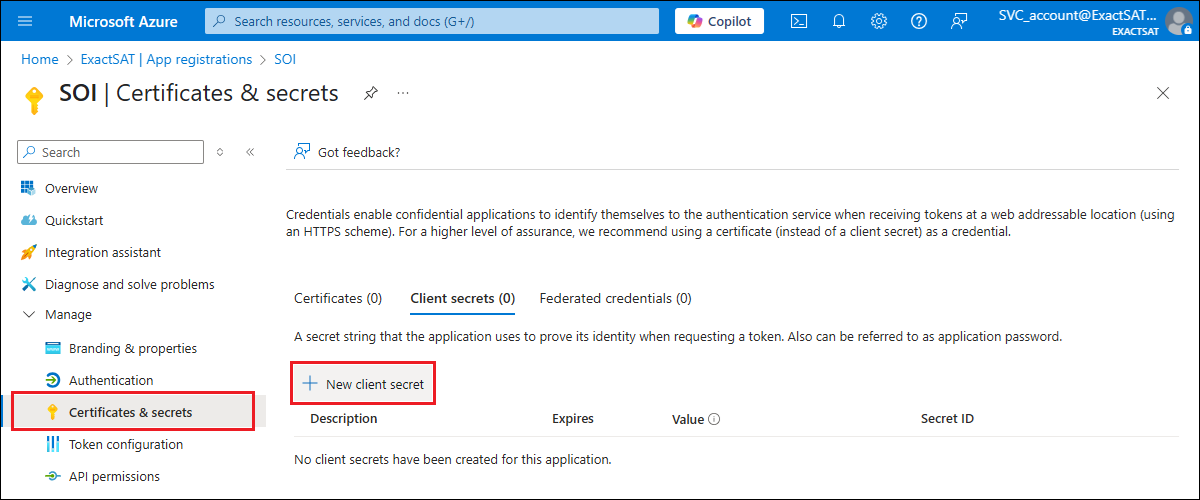
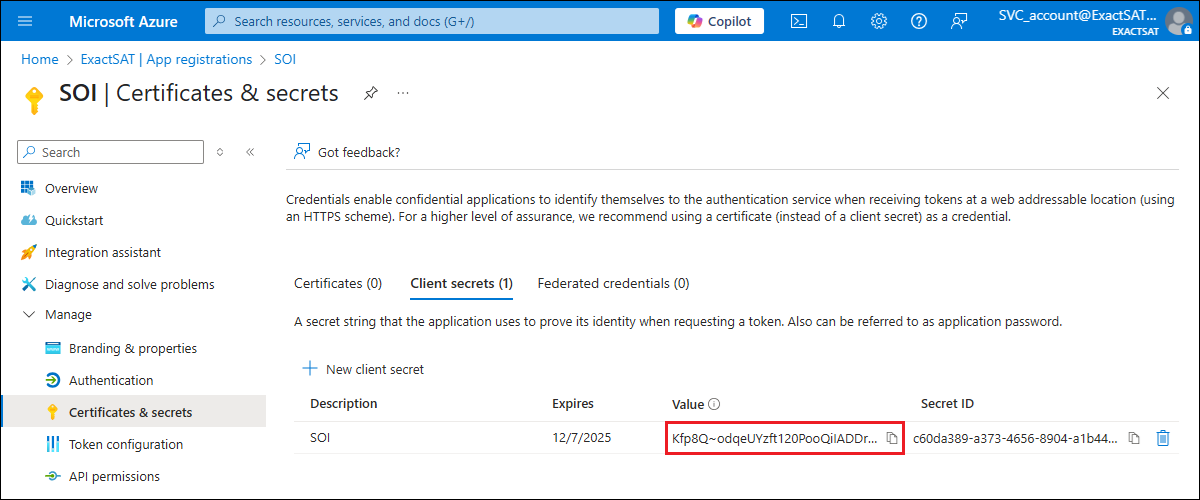
- On the left panel, click Certificates & secrets.
- Click + New client secret.
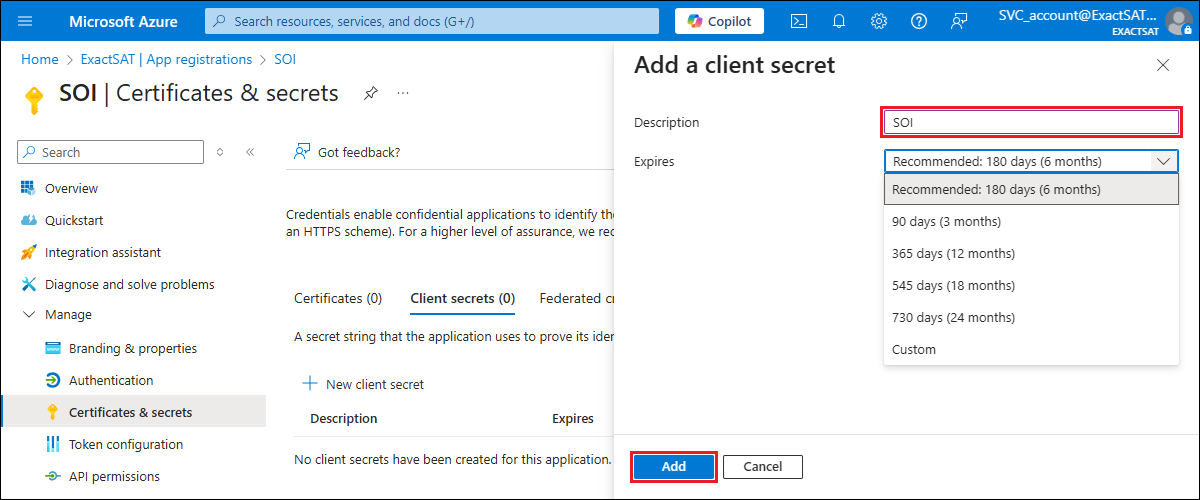
- Enter a description for the client secret.
- Adjust the Expiry date if needed.
- Click Add.
- The client ID will be displayed in the Value column.
- Click the Copy icon to copy the IDs to the respective fields in HRM: Settings.
- Click Save.
How do I add permissions?
- After the above steps have been completed, on the left panel of the same page, click API permissions under the Manage section.
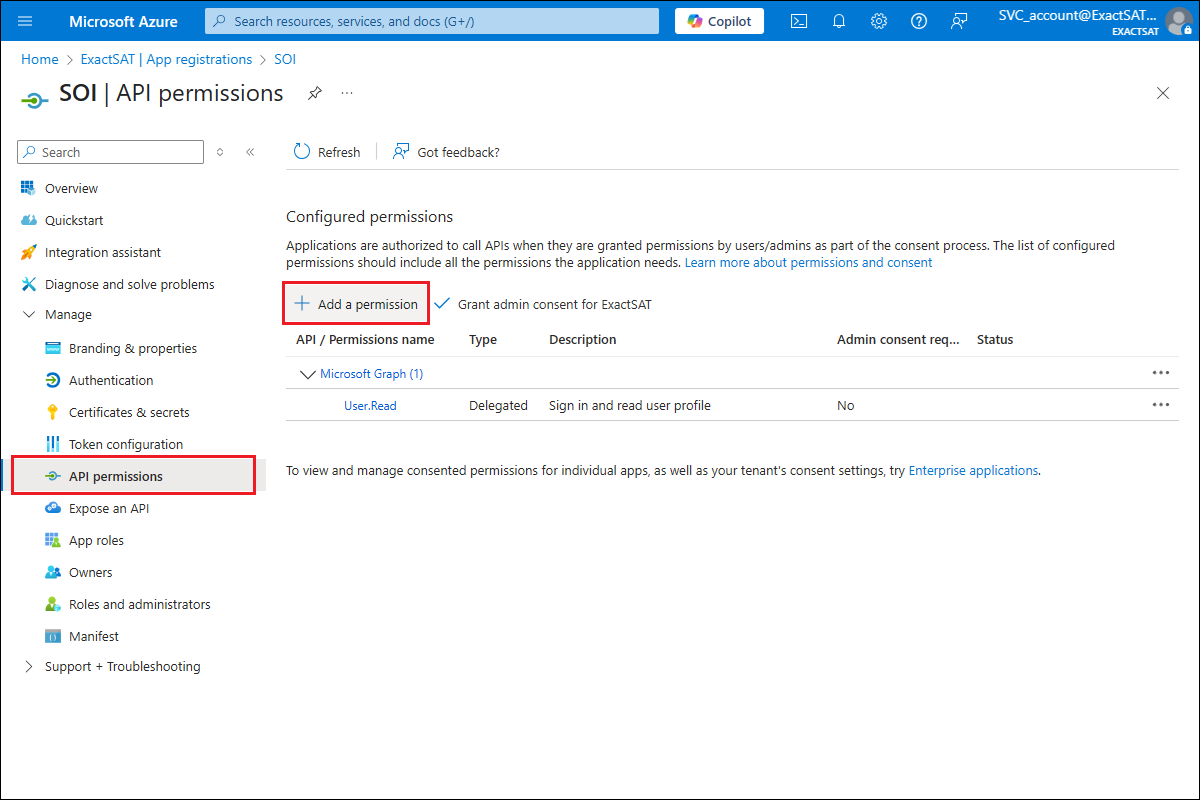
- Click Add a permission.
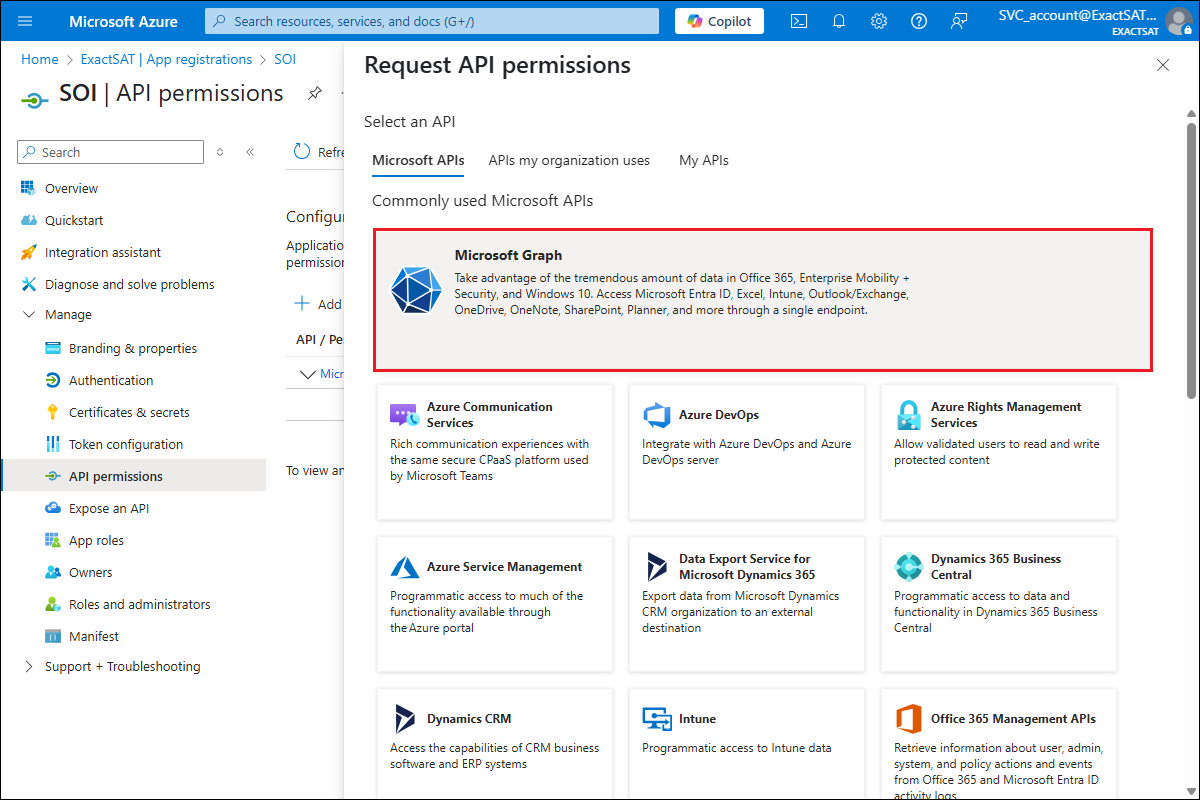
- The Request API permissions panel will be displayed.
- Click Microsoft APIs.
- Click Microsoft Graph.
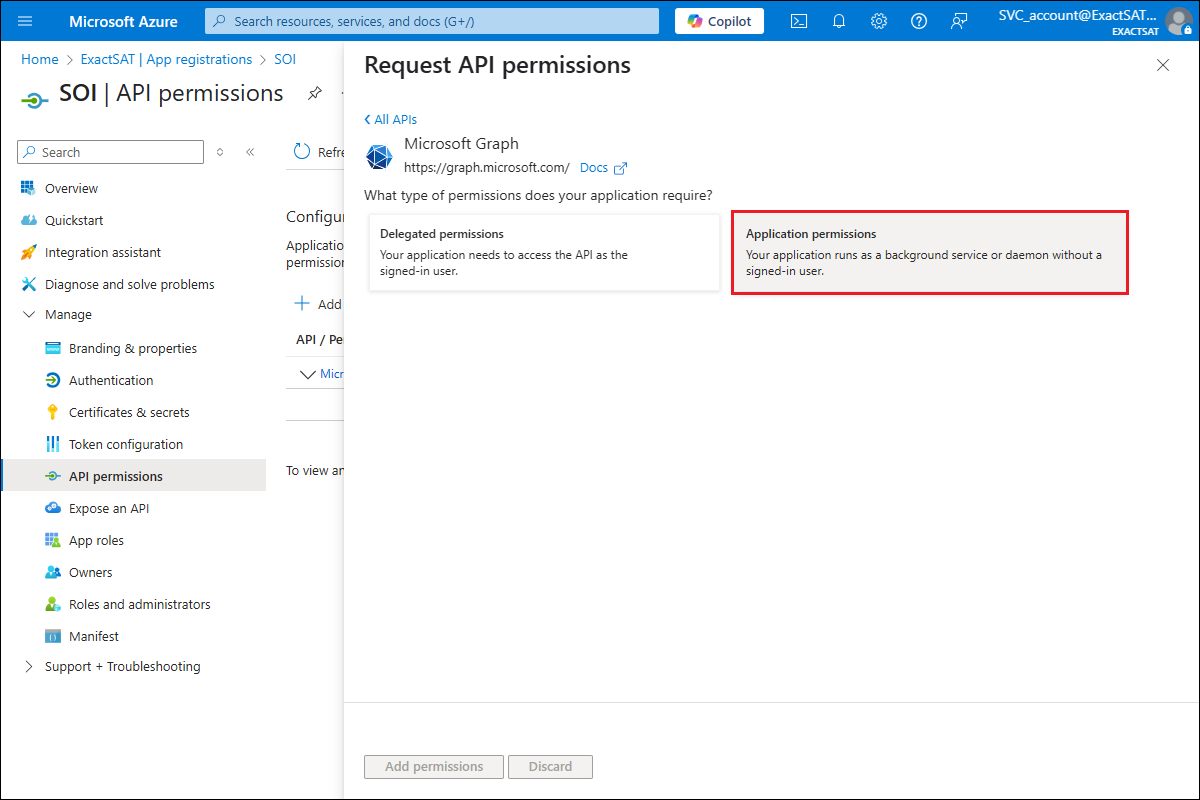
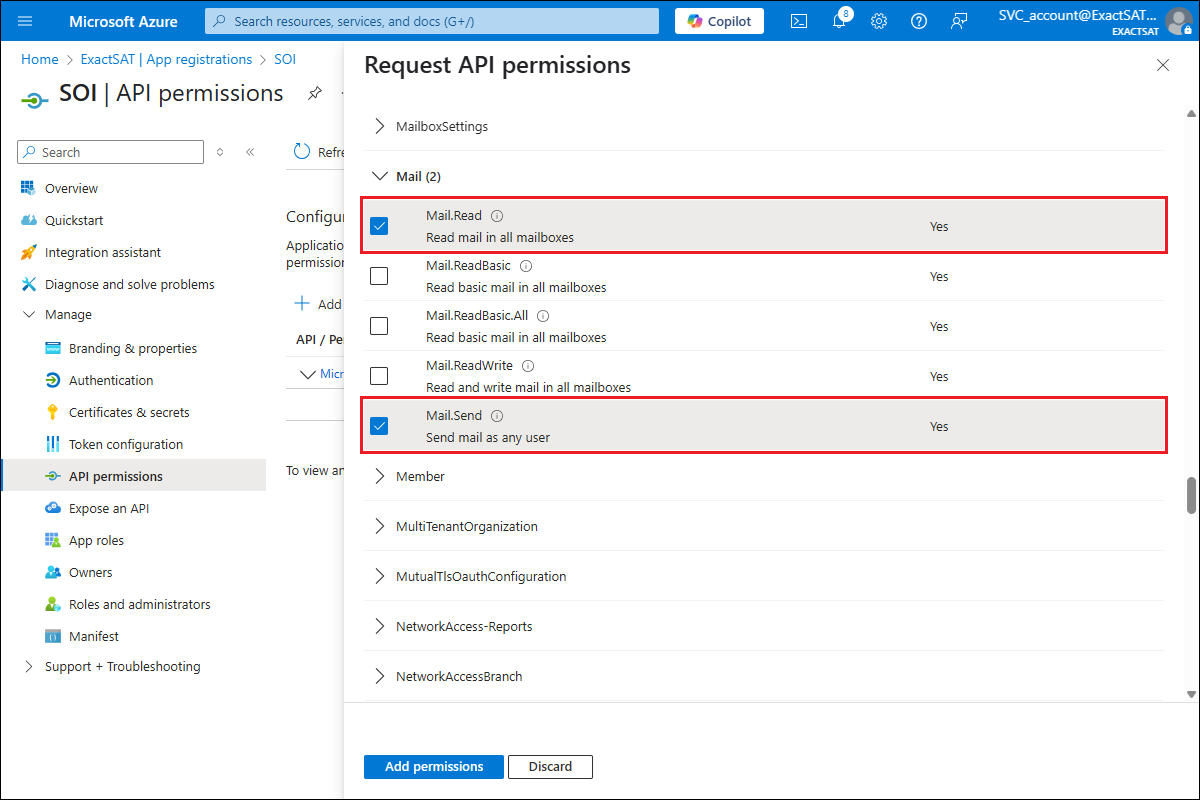
- Select Application permissions as the permission type.
- Next, select the following permissions under the Mail section:
- Mail.Read (Permission required for SOI)
- Mail.Send (Permission required for SMTP functionality)
- Next, select the following permissions under the User section:
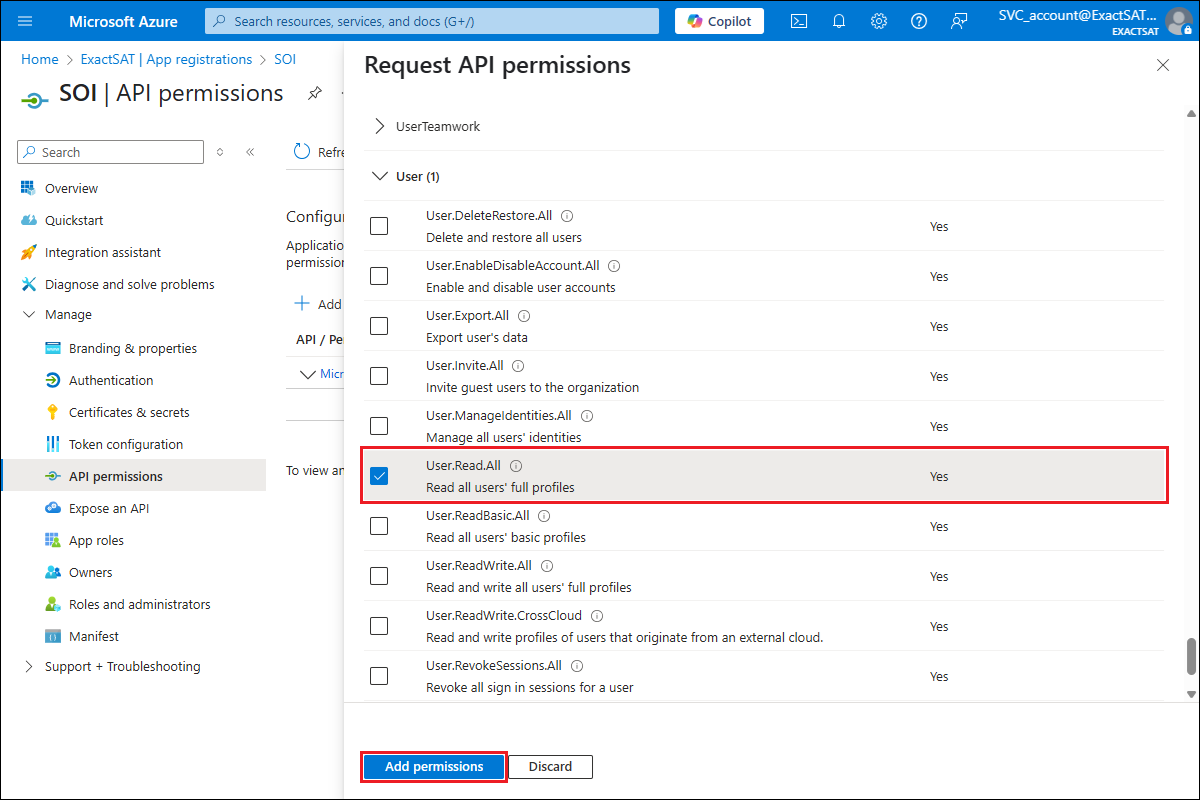
- Click Add permissions.
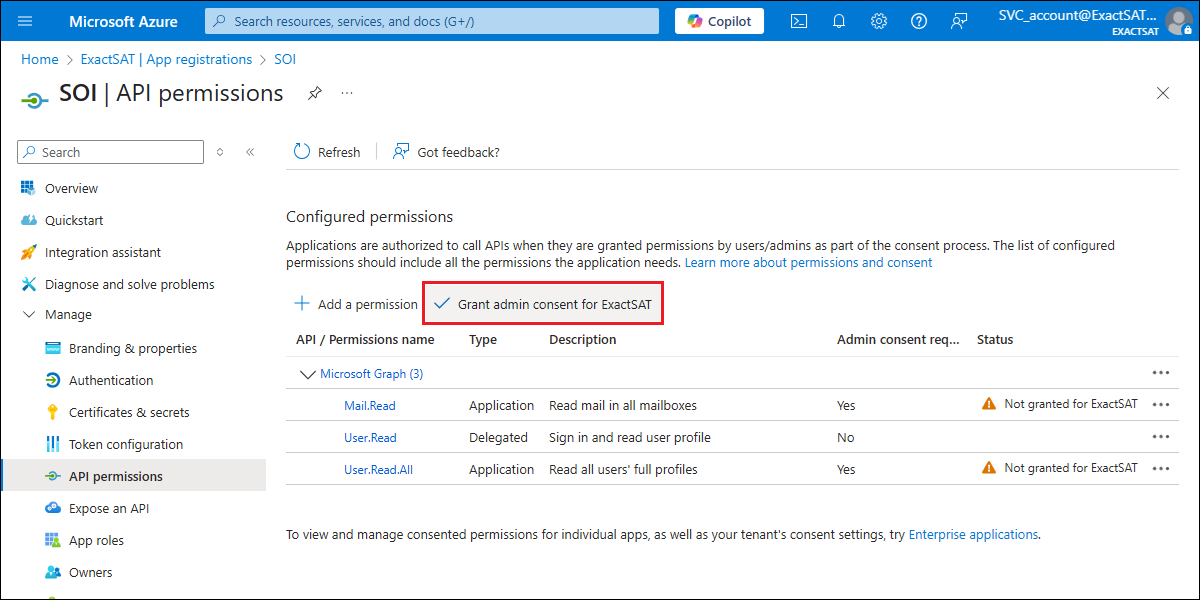
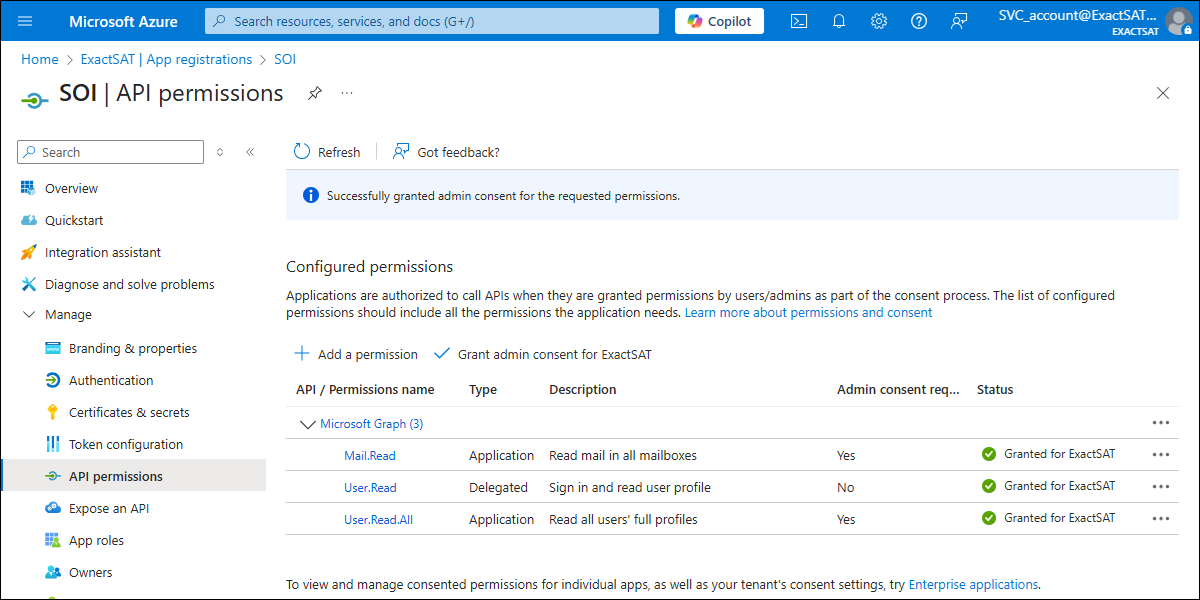
- The application permissions that have been added will then be displayed in the list.
- If the Status column for the respective API or permission name is blank or it displays the ”Not granted for the Domain name” message, click the Grant admin consent for [Domain name].
- You will see the following message:
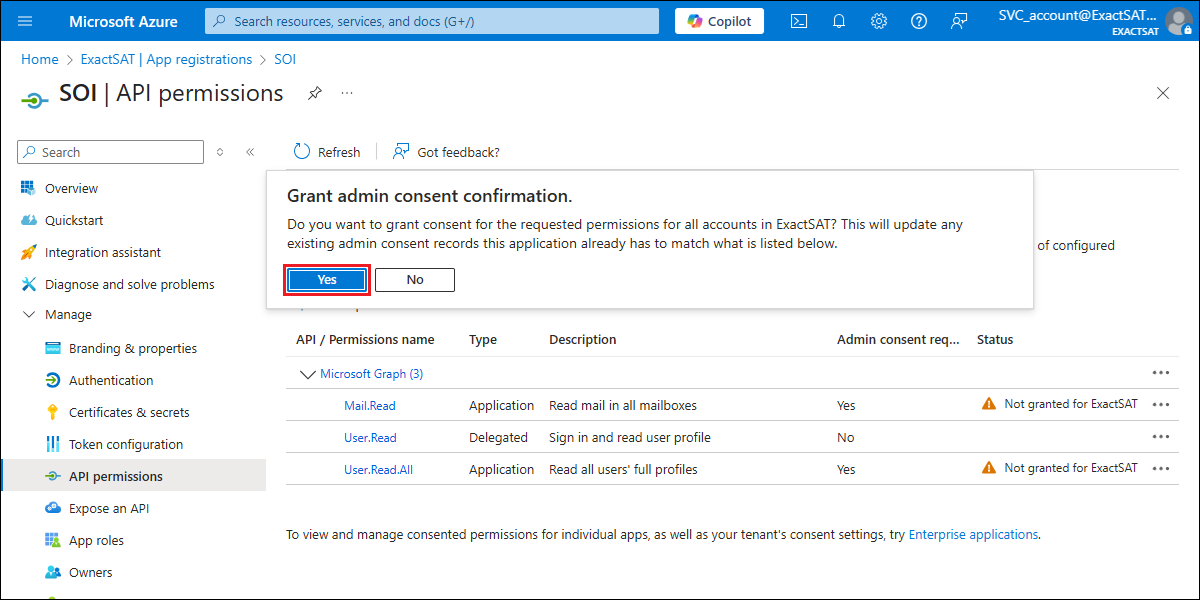
- Click Yes. The status will be updated to
“Granted”.
Related documents
| Main Category: |
Attachments & notes |
Document Type: |
Online help main |
| Category: |
|
Security level: |
All - 0 |
| Sub category: |
|
Document ID: |
32.621.750 |
| Assortment: |
Exact Synergy Enterprise
|
Date: |
29-10-2025 |
| Release: |
|
Attachment: |
|
| Disclaimer |