How-to: Installing Exact Exchange Synergy Enterprise Integrator (Exchange 2010)
Introduction
Exact Synergy Enterprise now supports Microsoft Exchange 2010. This document describes the prerequisites and installation steps for setting up the synchronization between Microsoft Exchange 2010 and Exact Synergy Enterprise for product updates 244 to 249.
For more information on installing Exact Exchange Integrator for product updates 250 to 253, see How-to: Installing Exact Exchange Integrator (Microsoft Exchange 2010) for product updates 250 to 253. For product update 254 onwards, see How-to: Installing Exact Exchange Integrator (Microsoft Exchange) for product update 254 onwards.
Description
The intended audiences for this document are server administrators or professionals who maintain corporate networks.
After you have successfully installed the Exchange calendar synchronization for Microsoft Exchange 2010, you will need to migrate a user account from the previous version of Exchange server to Microsoft Exchange 2010. After the migration of this user account, the calendar synchronization will continue to work without the end user noticing any difference. When all user accounts are in Microsoft Exchange 2010, the background jobs for previous Exchange calendar synchronization can be removed.
Topics in this document:
Prerequisites
The following sections A to F refer to the requirements and need to be available so that the installation can be completed successfully:
A) System Requirements for Microsoft Exchange Server 2010
Personal computer
- X64 architecture-based (64 bit)
Operating system
- Microsoft Windows Server 2008 x64 Standard and Enterprise Edition with Service Pack 2, or
- Microsoft Windows Server 2008 R2 Standard and Enterprise Edition
Operating system for installing management tools
- 64-bit editions Microsoft Windows Vista, or
- Microsoft Windows 7, or
- Windows Server 2008
B) Exact Synergy Enterprise
- Product updates 244 to 249
C) Database system
- Microsoft SQL Server 2005/2008
D) Others
- Microsoft .NET Framework 3.5 SP1
- Messaging Queue (MSMQ)
For more information, see http://www.microsoft.com/exchange/2010/en/us/system-requirements.aspx.
E) Fixed user account
This is a new or existing user account with administrative rights. This account is to be used for the automated synchronization between Microsoft Exchange 2010 and Exact Synergy Enterprise. This user account has to be a valid user within Exact Synergy Enterprise and Microsoft Exchange 2010. This is the same user account that you use to start the background jobs for Microsoft Exchange 2003/2007.
This account is also used to run the windows services responsible for the synchronization. You need to do the following:
- Create an Exact Synchronization Framework user either as a domain or local user and grant administrator rights with the following details:
|
Full name of the user
|
|
Description for the user
|
- Create the Exact Synchronization Framework local/domain user as a valid person in Exact Synergy Enterprise with administrator role.
F) Assigning impersonation role for the fixed user
Exchange Impersonation enables a caller to impersonate a given user account. This enables the caller to perform operations by using the permissions that are associated with the impersonated account, instead of the permissions that are associated with the caller's account.
For more information, see http://msdn.microsoft.com/en-us/library/bb204095.aspx.
Top
Installing Exact Exchange Synergy Enterprise Integrator
In typical scenarios, Exact Synergy Enterprise is installed on individual web server(s) and job server(s) are set up in similar methods. In some cases, both the job and web servers can reside in one physical server.
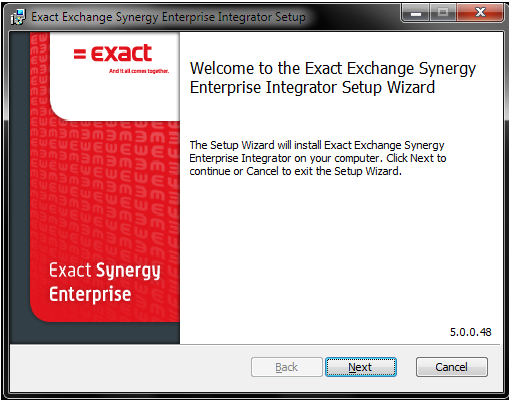
1. Run the deployment package, ExchangeIntegrator.msi at server side. This can be found in the cab folder of the Synergy installation folder. You will then see the following screen:
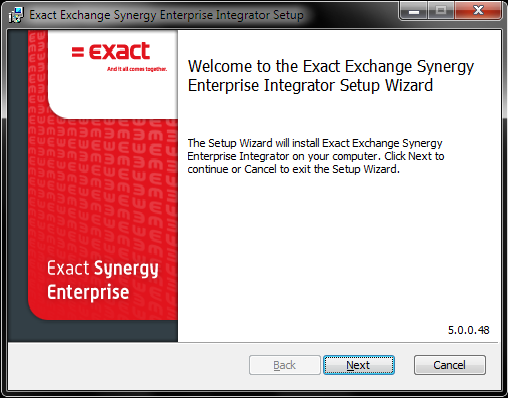
2. Click Next to begin the installation.
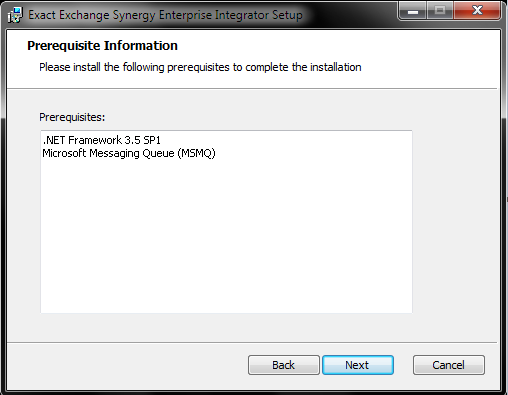
3. This screen displays the prerequisites that are needed but not installed in your PC. You need to install the prerequisites before proceeding. Once installed, click Next.
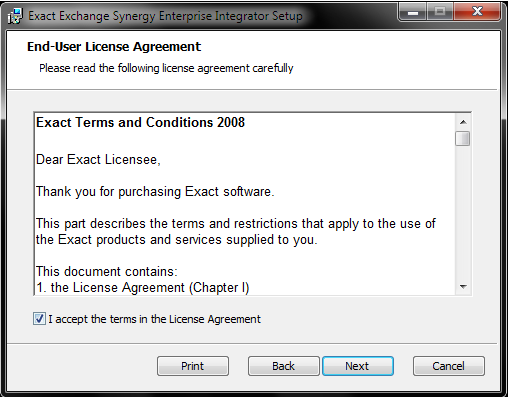
4. Select the I accept the terms in the License Agreement check box, and then click Next.
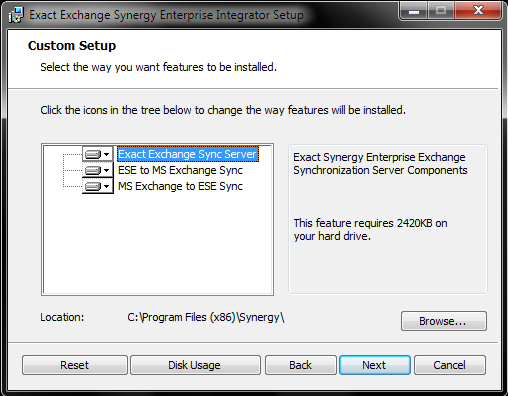
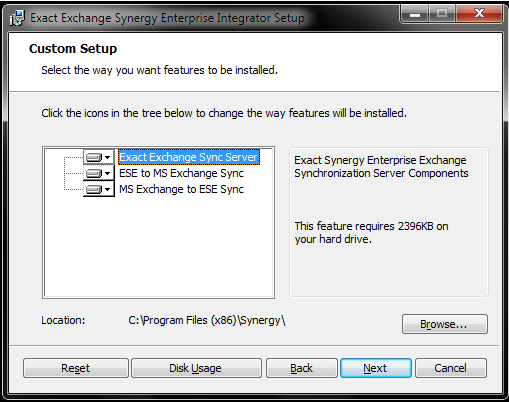
5. In Custom Setup, options Exact Exchange Sync Server, ESE to MS Exchange Sync, and MS Exchange to ESE are available. The first option Exact Exchange Sync Server must be installed regardless of whether the services are installed on a single physical server or multiple physical servers or which synchronization direction is to be installed.
a) Installing on multiple physical servers
-
Web server — Choose the option ESE to MS Exchange Sync, and then click the Browse button to specify the installation folder. You need to specify the correct ESE installation folder so that the necessary files are installed to the correct folder. Then, disable the option MS Exchange to ESE Sync to make the feature unavailable. Click Next.
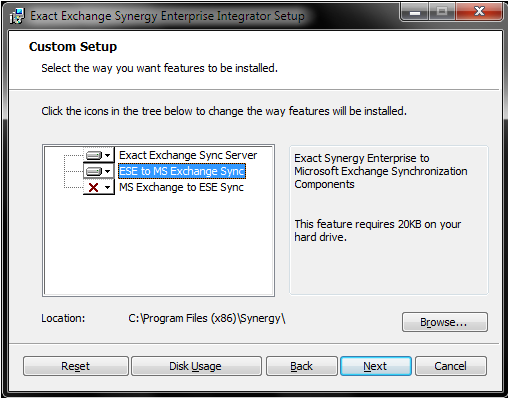
-
Job server — Choose the option MS Exchange to ESE Sync, and then click the Browse button to specify the installation folder. You need to specify the correct ESE installation folder so that the necessary files are installed to the correct folder. Then, disable the option ESE to MS Exchange Sync to make the feature unavailable. Click Next.

b) Installing on single physical server
Choose the options to install depending on the preferred direction of the synchronization. If both directions are required to be installed, all options need to be selected. Click the Browse button to specify the installation folder. You need to specify the correct ESE installation folder so that the necessary files are installed to the correct folder. Click Next.
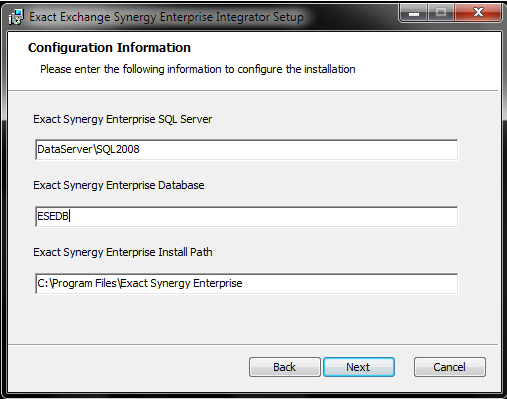
6. Fill in the following fields:
- Exact Synergy Enterprise SQL Server — If the SQL server name contains an instance, for example: "DataServer\SQL2008", the SQL server instance should be case-sensitive.
- Exact Synergy Enterprise Database
- Exact Synergy Enterprise Install Path — For examples, C:\Program files\Exact Synergy Enterprise or C:\Program files (x86)\Exact Synergy Enterprise.
7. Click Next to display the following screen:
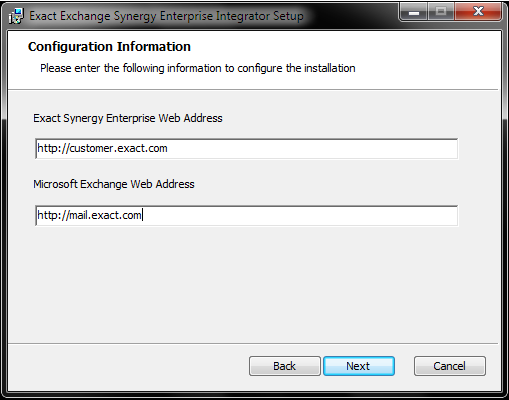
8. Fill in the following fields:
- Exact Synergy Enterprise Web Address — You need to create virtual directory on the server that is installed with Exchange 2010 synchronization to connect to Exact Synergy Enterprise web site. For example, you create a virtual directory called “Synergy” to connect to Exact Synergy Enterprise, the web address might be <server name>/Synergy, then in the wizard, use <server name>/synergy as the Exact Synergy Enterprise Web Address.
Note: Trailing slash (a / at the end of the web address) should not be used.
- Microsoft Exchange Web Address — This URL points to the Exchange 2010 Server. The FQDN of the Exchange 2010 server. For example: http://mail.exact.com. You do not need to add "/owa" to the web address.
9. Click Next to display the following screen:
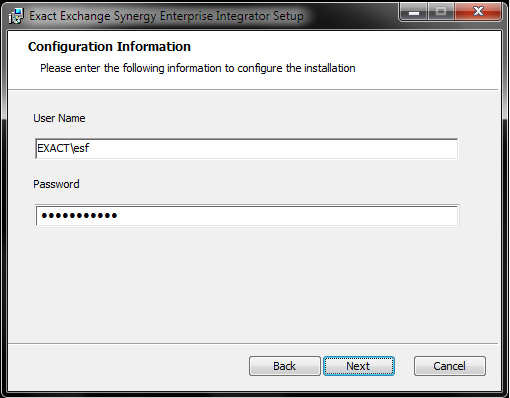
10. Fill in the following fields:
- User Name — This is the fixed user that is created in section E. For example, "<domain>\esf", "<machine name>\esf".
- Password — This is the password of the user defined at User Name.
11. Click Next.
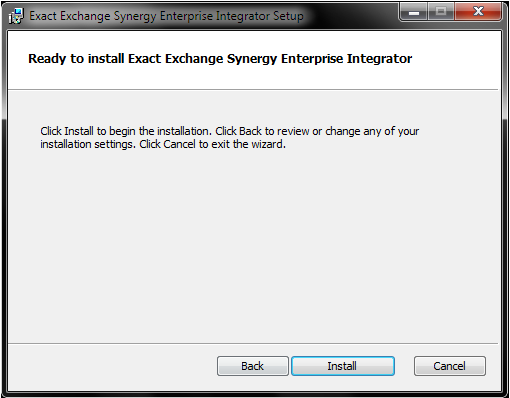
12. Exact Exchange Synergy Enterprise Integrator is now ready to be installed. Click Install.
13. Once the installation is completed, you will see the following screen:
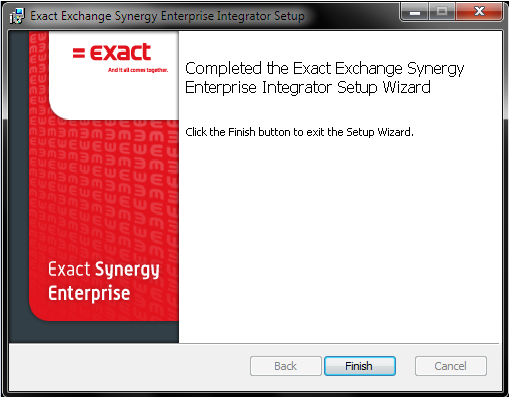
14. Click Finish to exit.
Top
Performing checks after installation
After the installation, you need to verify if the process is completed successfully by doing the following:
- Go to Computer management/event viewer/window logs/Application. Make sure there is no installation error from the ExchangeIntegrator.msi.
- Go to Computer management/services. Make sure the following services are installed and started by default:
- Exact Exchange Synchronization Puller Monitor (for multiple physical server installation, only installed on the background job server).
- Exact Exchange Synchronization Resolver Monitor (installed on both the background job and web servers).
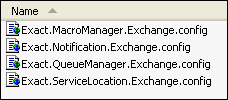
- Go to the Exact Synergy Enterprise installation directory. In the following folders the following targets are deployed:
Exchange Integrator\bin
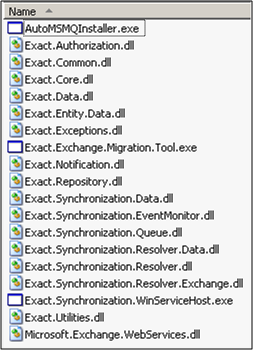
Exchange Integrator\xmd
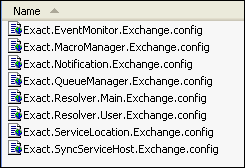
Exact Synergy Enterprise\bin

Exact Synergy Enterprise\xmd
Top
Uninstalling Exact Exchange Synergy Enterprise Integrator
There are two ways to uninstall the Exact Exchange Synergy Enterprise Integrator.
A) To uninstall via MSI:
1. Run the deployment package at the server side - ExchangeIntegrator.msi.
2. If the components exist, the following screen will be displayed:

3. Click Remove to uninstall.
B) To uninstall via Control Panel (Add/Remove programs):
1. Search for the Exact Exchange Synergy Enterprise Integrator application.
2. Select the application and click Uninstall or Remove (depending on your operating system).
Top
Defining parameters
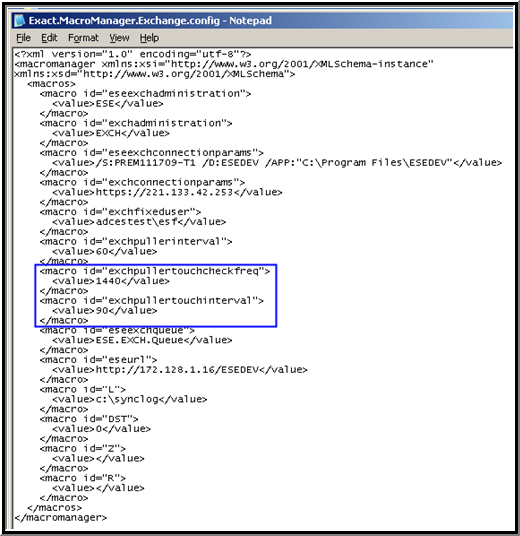
After installation of deployment package, an administrator is able to customize the default parameters via the configuration file. This configuration file is called Exact.MacroManager.Exchange.config and deployed in two different folders:
Note: Any changes done to the configuration file require that the Windows Services for both the web server and job server to be restarted.
- XMD folder of Exact Synergy Enterprise. For example, C:\Program Files\Exact Synergy Enterprise\xmd.
- XMD folder of Exchange Integrator. For example, C:\Program Files\Exact Synergy Enterprise\Exchange Integrator\xmd.
The parameters supported by Exact Exchange Synergy Enterprise Integrator for Exchange 2010 are:
a) L — Path and file name of where the information log is stored. For example, if you want to store the log file in drive “C:” in a folder call “ExchLog” and the logfile name is “ExchLog.log”, what you need to do is:
1. User to create the folder “ExchLog” in drive “C:”
2. In the Exchange.MacroManager.Exchange configuration file,
<macro id=”L”>
<value>c:\ExchLog\ExchLog<value>
The system will take the value of this setting and append date+time and extension “.log”.
Eg. C:\ExchLog\ExchLog_20101223_152537.log
b) DST — Daylight Saving Time where the values are:
- 0 — Adjustment without DST time format. Recurring appointments in Exact Synergy Enterprise will be updated if the last modified timestamp of the appointment from Microsoft Exchange is more recent compared to the timestamp when the synchronization was last run.
- 2 — Adjustment according to DST time format. Recurring appointment types will always be updated, regardless of the timestamp.
c) Z — Exclude synchronization of specific users. For example, <person1 id>, <person2 id>.
d) R — Include synchronization of specific users only. For example, <person1 id>, <person2 id>.
The following two parameters will be used for recurring appointments that do not have end dates filled in:
a) exchpullertouchcheckfreq
- This setting is defined in the unit of minute.
- The default setting is 1,440 minutes.
- This setting affects the synchronization of recurring appointments with no end date, from Exchange server to Exact Synergy Enterprise.
- The Windows service Exact Exchange Synchronization Puller Monitor is responsible for checking any notifications on recurring appointments with no end date from the Exchange server. This action will be carried out at every interval defined in this setting.
- For example, if the setting is 1,440 minutes, Exact Exchange Synchronization Puller Monitor will connect to the Exchange server every 1,440 minutes and retrieve recurring appointments with no end date and submit these for the synchronization process.
- For more information on synchronization of recurring appointments with no end date, see Understanding synchronization of recurring appointments with no end date.
b) exchpullertouchinterval
- This setting is defined in the unit of day.
- The default setting is 90 days.
- Recurring appointments with no end date will be updated and extended to the corresponding appointments in Exact Synergy Enterprise in not more than the number of days defined from the last updated appointment date in the series. For example, if the setting is 90 days, the corresponding recurring appointment in Exact Synergy Enterprise will be extended not more than 90 days from the last updated appointment date in the series.
- For more information on synchronization of recurring appointments with no end date, see Understanding synchronization of recurring appointments with no end date.
Top
Frequently asked questions
a) How can I resolve the following error that is displayed in the error log?
[ERROR] Create calendar appointment: The HTTP request is unauthorized with client authentication scheme 'Negotiate'. The authentication header received from the server was 'NTLM'
To solve the error, disable the loopback check in the registry, as explained in the following steps:
- In the Registry Editor, locate and click the registry key HKEY_LOCAL_MACHINE\SYSTEM\CurrentControlSet\Control\Lsa.
- Create the value DisableLoopbackCheck and enter 1 in the Value data box.
- Click OK.
- Restart your PC.
For more information, see Authentication problems by using of NTLM.
b) Why do I get an error that the Exchange server version is not supported when using Exchange 2010?
[WARN] Not supported Exchange Server version
To solve this, go to HRM à Setup à General à Settings. Under the Server section, select the create Exchange Mailbox check box at Domain: New - People (Pre-Win2000). Then, select the related server at Exchange server version.
c) Can I create a backup of the configuration file to the same folder before making changes?
It is not advisable to create a backup of the configuration file in the same older. This is because it will affect the configuration of the services. It will be more advisable to create a backup in another location.
d) Are there other features that Exchange 2010 do not support?
Yes. Exchange 2010 does not support the creation of mailboxes. Also, the creation of e-mail and user accounts are not supported. However, the creation e-mail and user accounts can be performed via the Exact.Jobs.SysMaint background job. For more information, see Exact.Jobs.SysMaint.dll.
In addition, Exchange 2010 does not support the synchronization of contacts. However, you can do so via the Exact.Jobs.SysExchange background job. For more information, see Exact.Jobs.SysExchange (x32.dll and x.64.dll).
Top
Related documents
| Main Category: |
Support Product Know How |
Document Type: |
Online help main |
| Category: |
On-line help files |
Security level: |
All - 0 |
| Sub category: |
Details |
Document ID: |
20.918.101 |
| Assortment: |
Exact Synergy Enterprise
|
Date: |
23-01-2016 |
| Release: |
244 |
Attachment: |
|
| Disclaimer |