Installation guide - ERiC (Elster Rich Client) components (31.2.10.0) for Exact Globe Next
Introduction
In Germany, VAT returns, EU sales lists,
and E-Bilanz are sent electronically to the Elster clearing houses via the
so-called ERiC library. In addition to the necessary adjustments in Exact Globe
Next, some components of the so-called ERiC library provided by Elster must be
installed.
The ERiC library is continuously updated by Elster. A minimum version of the
ERiC library is set by Elster to send the Elster reports. This is integrated in
the respective Exact Globe Next version, therefore the required Elster ERiC
components must be updated accordingly.
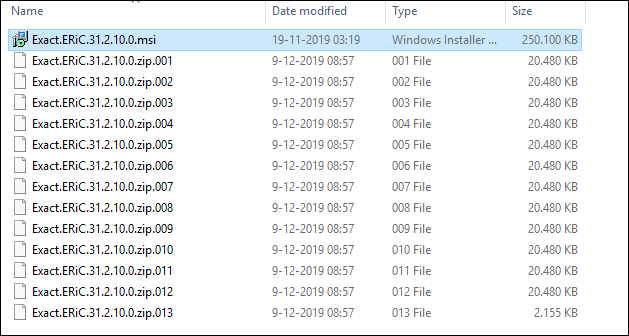
Downloading the setup file
The setup file is split into 13 parts (zip
files), that you have to download and extract via the 7-Zip tool. After
downloading the files below, right click the first file, select 7-Zip and
extract the file:
Keep in mind that the following components
must be installed on your system:
Before installing the updated Elster ERiC
components, the previous ERiC installation must be removed. For more
information, see Removing the ERiC components.
Installing the ERiC components
The setup can be started by
double-clicking the Exact.ERiC.31.2.10.0.msi file in the Windows
Explorer:
The following screen will be displayed:
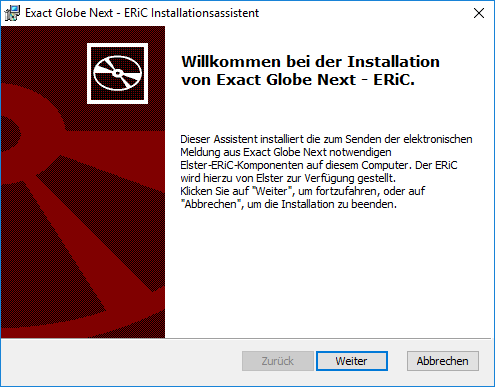
Click Weiter to continue.
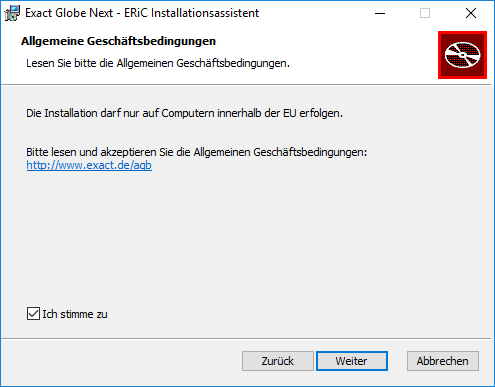
Select the Ich stimme zu check
box and click Weiter to continue.
The privacy policy warning of the
financial department will be displayed:
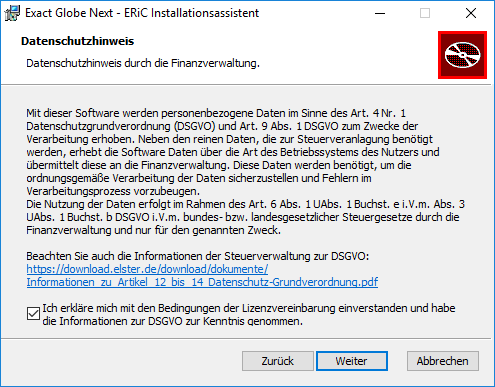
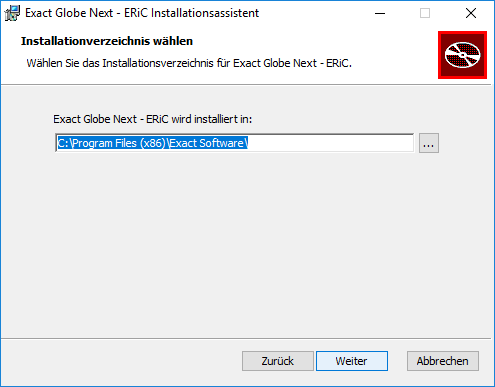
After you have given your consent by
selecting the check box and clicking Weiter, the installation directory
of the Elster ERiC components has to be entered. The installation directory of
Exact Globe Next is suggested here. It is recommended that you maintain this
directory as is, without changes:
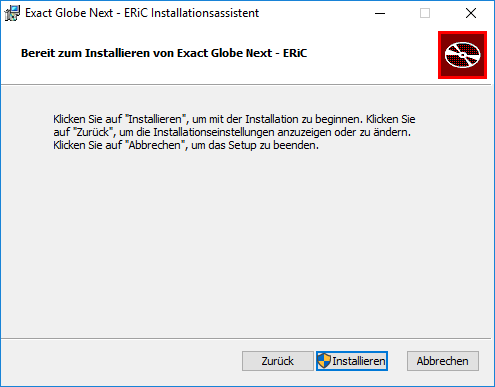
After clicking Weiter, the
following screen will be displayed. Here, you can start the installation by clicking
the Installieren button.
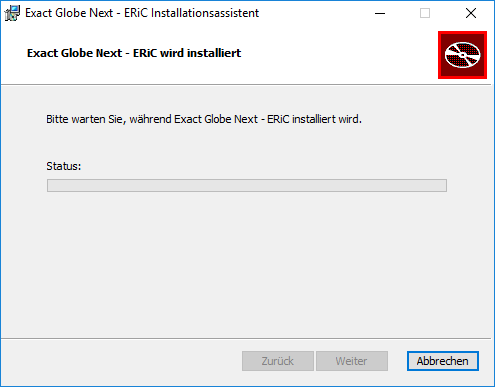
In the following screen, the progress of
the installation is displayed.
Click Fertig stellen to finish the
installation.
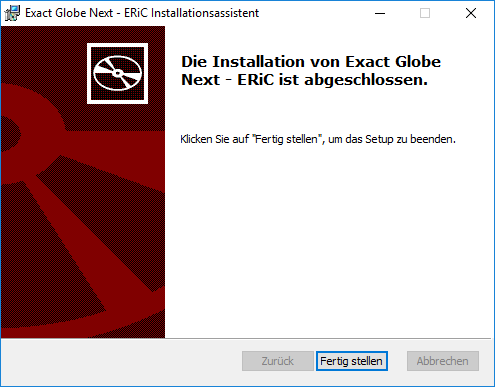
This completes the installation. In
addition to the installation, the installation path is entered as an
environment variable at Path.
Open Windows Explorer and manually create the 'data' and 'log' folders in the ERiC installation folder:
- C:\Program Files (x86)\Exact software\ERiC-31.2.10.0\data
- C:\Program Files (x86)\Exact software\ERiC-31.2.10.0\log
Removing the ERiC components
The Elster ERiC components are uninstalled
in the system settings under the Apps & features section. Click Exact
Globe Next - ERiC and then Uninstall:
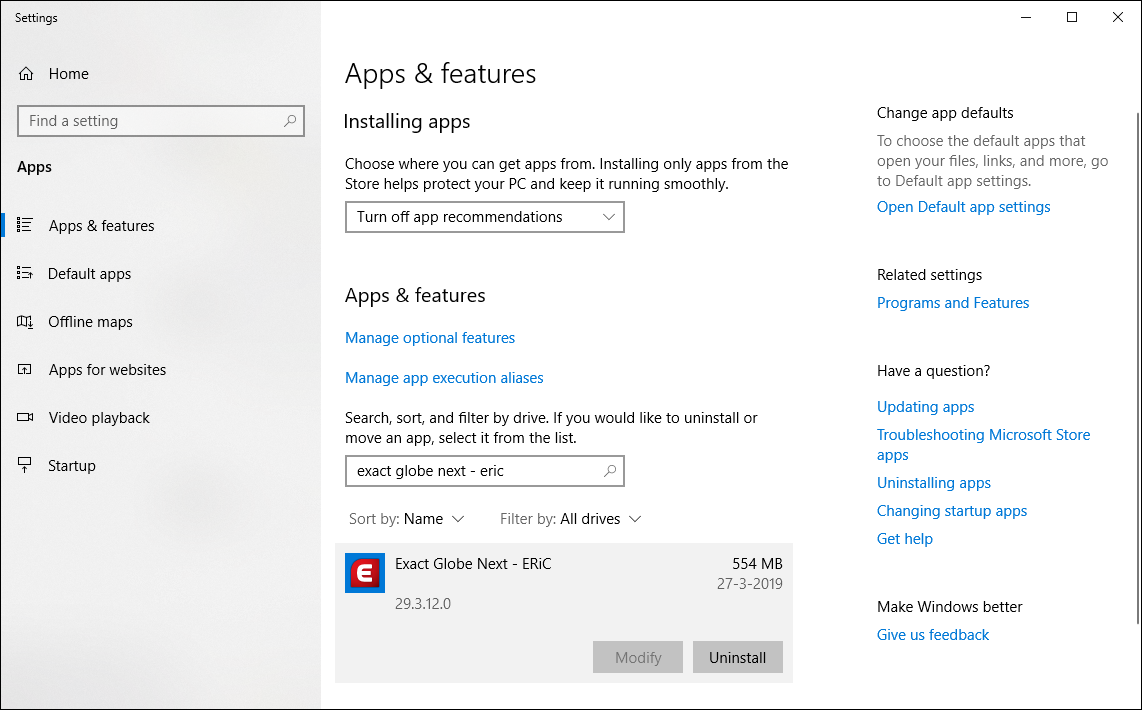
Click Uninstall.
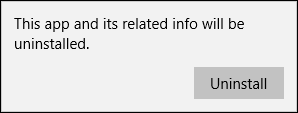
The Elster ERiC components will be removed
from your computer.
Setting the environment variables
Additional information is required to send
the electronic messages. These are set via the so-called environmental
variables.
Environmental variables
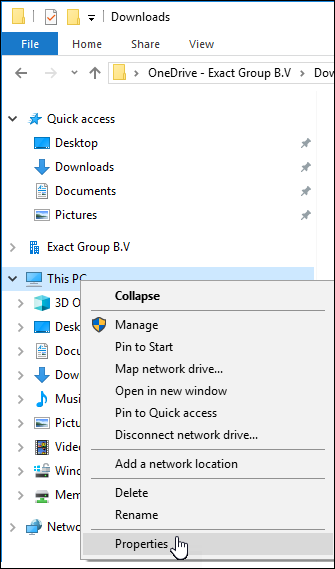
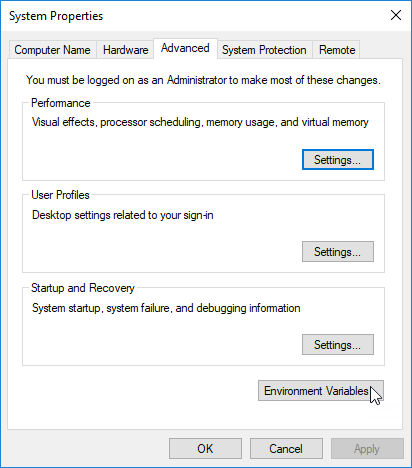
Open your Windows Explorer, right-click on
This PC, and select Properties.
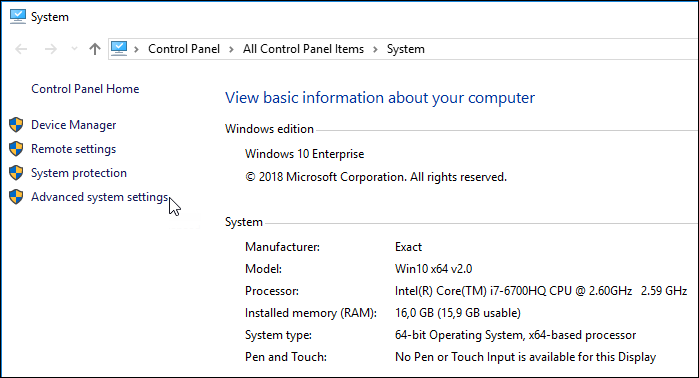
Click Advanced system settings.
Click the Advanced tab, and then
select Environment Variables.
Under the System variables section,
create or edit the variables.
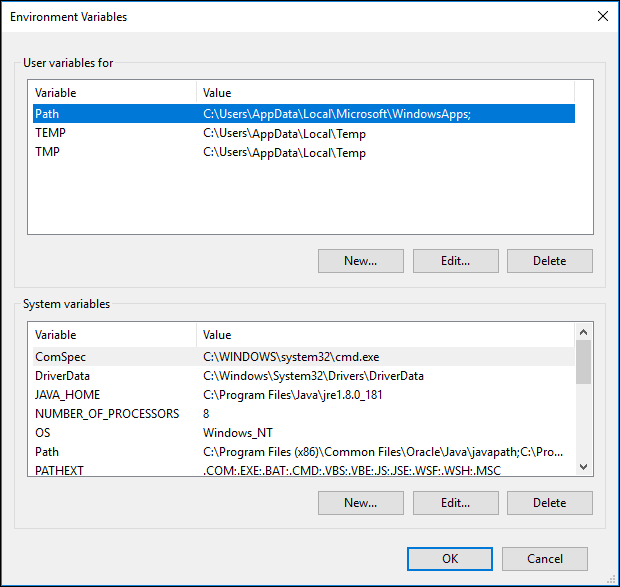
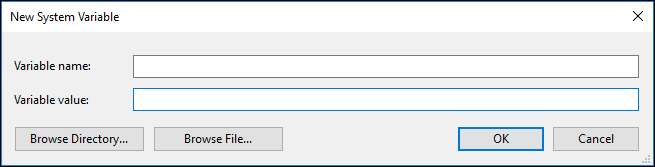
Click the New button to define a
new system variable, as displayed in the following screen:
Add
the following environment variables:
|
Variable name
|
Variable value
|
Remark
|
|
ERIC_DATA_HOME
|
C:\Program
Files (x86)\Exact software\ERiC-31.2.10.0\data
|
Path
of the Data folder of the ERiC installation folder.
|
|
ERIC_LOG_HOME
|
C:\Program
Files (x86)\Exact software\ERiC-31.2.10.0\log
|
Path
of the Log folder of the ERiC installation folder.
|
|
Path
|
C:\Program
Files (x86)\Exact software\ERiC-31.2.10.0\dll
|
Path
of the dll folder in the installation folder. If other paths have been
defined for this variable, add the ERiC dll folder path by first filling in a
delimiter “;”, followed by the entire path.
|
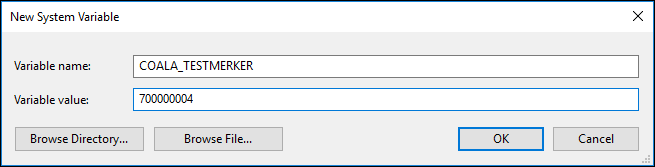
Test reports
To generate test reports, the environment
variable COALA_TESTMERKER must be set. To set the value, enter 700000004
at Variable value:
Note:
In the case of a test report from a
live company, the processed VAT will be sent. A new report can only be sent as
a correction. For this reason, test reports should only be sent from test
companies, or a backup has to be created before sending a test report. After
sending the test report, the backup must be restored.
| Main Category: |
Attachments & notes |
Document Type: |
Release notes detail |
| Category: |
|
Security level: |
All - 0 |
| Sub category: |
|
Document ID: |
29.394.220 |
| Assortment: |
Exact Globe
|
Date: |
18-05-2020 |
| Release: |
|
Attachment: |
|
| Disclaimer |