How-to: Migrating from Exact Globe to Exact Globe+
Introduction
This
document guides you on how to switch from Exact Globe to Exact Globe+.
Important
information before you migrate
It’s important to create a backup of your companies, and check
beforehand if your system meets the system
requirements of Exact Globe+. Since Exact Globe+
applies completely new technology, the migration needs extra attention if
you’ve third party solutions. Contact the supplier of your third solutions
before migrating to Exact Globe+.
Keep in mind that you cannot run Exact Globe+ and Exact Globe Next at the same time. This can be done only for testing purposes. If you want to run Exact Globe+ in a production environment, you must uninstall Exact Globe Next. For more information, see Important things to note when uninstalling Exact Compact or Exact Globe Next and installing Exact Compact+ or Exact Globe+.
Switching from Exact Globe to Exact Globe+
Seamless migration
For convenience of users, a seamless migration process has been developed to assist users to migrate from Exact Globe to Exact Globe+. This process will go through the following stages:
- Updating software packages.
- Updating contract and license.
When you are eligble to migrate, you will receive an email to inform you.
Follow the steps below to carry out the seamless migration:
- Open Add
or remove programs in the Windows control panel and uninstall the
following:
- Exact Globe Next. You must
select the option Remove unused shared files during the
uninstallation process.
- ELIS dispatcher.
- Nova PDF printer.
- Download
and start "ProductUpdater_T25.exe". You can download this file by
clicking this link.
- Enter your username and password. Click Install.
- Click Next to begin the process. Click Advanced settings if you want to change the settings although this is not necessary.
- Upon completion of installation, click Open company to start Exact Globe+.
- On first start of Exact Globe+, the wizard will also connect to Exact servers to check and update the appropriate contract and license.
Advanced installation
During
the advanced installation, you can define the folder that you want to install
Exact Globe+.
For
Exact Globe+, two installation scenarios are possible:
- Standalone
installation - In the standalone scenario, you
have one computer that you are working with Exact Globe+. Both Exact
Globe+ and SQL Server are installed on this computer. It is possible that
this computer is part of a network but if you are only using Exact Globe+
on this computer and all the software related to Exact are installed on
this computer, then this is a standalone installation.
- Network installation - The SQL Server and a network installation of Exact
Globe+ are installed on the server. On the different workstations, a
network installation of Exact Globe+ is performed. Thus, in a company,
multiple people can work at the same time.
Standalone installation
All the following steps have to be performed on the workstation:
- Log in
as an administrator on the computer where you want to install Exact
Globe+.
- Open Add
or remove programs in the Windows control panel and uninstall the
following:
- Exact Globe Next. You must
select the option Remove unused shared files during the
uninstallation process.
- ELIS dispatcher.
- Nova PDF printer.
- Save
the file ProductUpdater_T25.exe at a location on the computer
where you want to perform the installation.
- By default, your username will be displayed at User
Name (this is the username that you use to log in to the customer portal).
Type your password at Password (this is the password that you use to log
in to the customer portal).
- Click Install.
- The latest Exact Globe+ version will be
displayed. You can click Next to continue, or Advanced settings to
select the following:
- Version — Select the version number that
you want to install. You can also click to refresh the field and get the latest
version number. The highest allowed product update or service pack that you can
download is automatically displayed.
- Installation directory — Type or select
the folder where the Exact Globe+ application files are located.
- Install mode — Select Internet
workstation installation.
- Download demo company — Select this check
box to download the files of a demo company during the installation.
- Download
help files — Select this check box to download all the help
files. These help files are available when you are offline.
- Once you click Next, the system will
determine how many files need to be installed.
- Click Install to start the installation.
- Once
the installation is done, a notification is displayed asking you if you want to
open Exact Globe+.
Network installation
In a network installation, Exact Globe+ is installed on the
server. On the different workstations, a network installation of Exact
Globe+ is performed.
- Log in
as an administrator on the server where you want to install Exact Globe+.
- Open Add
or remove programs in the Windows control panel and uninstall the
following:
- Exact Globe Next. You must
select the option Remove unused shared files during the
uninstallation process.
- ELIS dispatcher.
- Nova PDF printer.
- Save
the file ProductUpdater_T25.exe at a location on the server
where you want to perform the installation.
- Click
the file to start the installation.
- By default, your username will be displayed at User
Name (this is the username that you use to log in to the customer portal).
Type your password at Password (this is the password that you use to log
in to the customer portal).
- Click Install.
- The latest Exact Globe+ version will be
displayed. You can click Next to continue, or Advanced settings
to select the following:
- Version — Select the version number that
you want to install. You can also click to refresh the field and get the latest
version number. The highest allowed product update or service pack that you can
download is automatically displayed.
- Installation directory — Type or select
the folder where the Exact Globe+ application files are located.
- Install mode — Select Internet network installation.
- Download demo company — Select this check
box to download the files of a demo company during the installation.
- Download
help files — Select this check box to download all the help
files. These help files are available when you are offline.
- Once you click Next, the
system will determine how many files need to be installed.
- Click Install
to start the installation.
- Once
the installation is done, a notification will be displayed.
- You
need to make sure the installation folder can be accessed from the
workstation. This can be done by sharing the folder on your network. Right
click the folder and select Share. A screen will be displayed whereby
you can manage the access rights for the domain users. Contact your system
administrator for more information about these rights.
- Now you
can start with the installation on the workstations.
- Log in
as an administrator on the workstation where you want to install Exact
Globe+.
- Open Add
or remove programs in the Windows control panel and uninstall the
following:
- Exact Globe Next. You must
select the option Remove unused shared files during the
uninstallation process.
- ELIS dispatcher.
- Nova PDF printer.
- Open
the Windows explorer and open the location of Exact Globe+ on the server.
- Start WSETUP.EXE.
- By
default, all the options in this screen are already defined. If needed,
you can select a different installation directory. This is the folder on
your workstation where the files of Exact Globe+ are located. Once done,
click OK.
- The
system will determine how many files need to be installed.
- Click Yes
to start the installation.
- Once
the installation is done, a notification will be displayed.
- Exact
Globe+ is now installed.
- If you
have more workstations, you can repeat the steps above for the other
workstations.
After the installation
After the
installation, additional steps are needed:
Entity services
During the
installation of Exact Globe+, the entity services of Exact Globe Next are
overwritten by the entity services of Exact Globe+. In general, nothing needs
to be adjusted. The Entity services in Exact Globe+ are the same as Exact
Globe. It is however strongly recommended to test if everything works as
expected.
ELIS
If you use ELIS,
you must install and configure the Exact Globe+ product in the ELIS Management
console. For more information, see Getting
started with Exact Lightweight Integration Server (ELIS).
Update
your scheduled tasks
The
names of the program files that you use to create the scheduled tasks are
different in Exact Globe+. You must adjust the command line of these scheduled
tasks to reflect the names of the new program files. The most used scheduled
task are:
|
Subject
|
Exact Globe Next
|
Exact Globe+
|
|
Data
import/export
|
ASImport.exe
|
Exact.XML.Launcher
|
|
Generate
Work in Progress
|
eprtWIP.exe
|
Exact.Project.WorkInProgress.exe
|
|
Diagnose
|
ECnvCheck.exe
|
Exact.Conversion.ConsistencyCheck.exe
|
|
Stock
valuation
|
Eastkrec.exe
|
Exact.Inventory.StockRevaluation.exe
|
|
Poll
function
|
CSIIRPoll.exe
|
CS.IIRS.Poll.exe
|
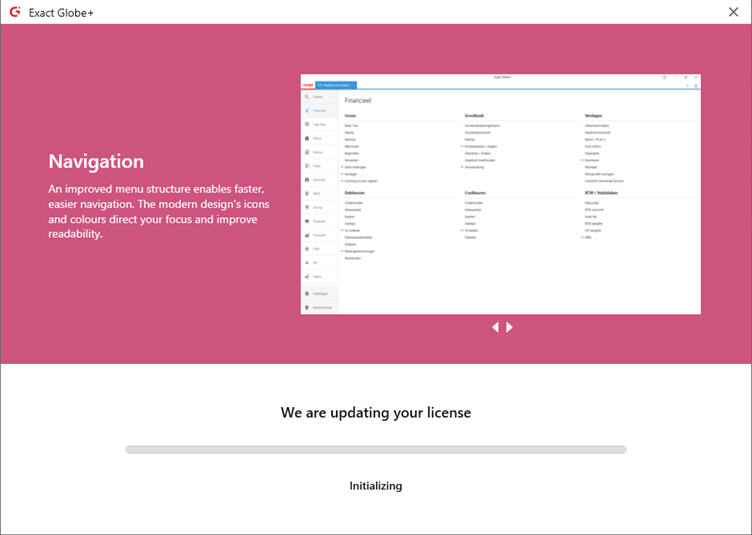
Activate the license
You must
activate and update the license in the companies when you first open them. Follow
these steps:
- Open the company. The interface to
activate your license will pop up.
- Fill in your credentials for the
customer portal and click Activate.
- The license is now activated and
updated.
Note that you
have up to 28 days to activate your license from the first time you open your
company. We strongly encourage you to activate it before this period lapses to
prevent disruption to your business.
How do I perform
an update?
- Create
a backup of your companies.
- Check
the release notes and system requirements of the product update that you
want to install.
- Start
Exact Globe+.
- Go to
Settings ➔
System ➔
Update.
- If the
menu path is unavailable, then you have a network installation. At Install
mode, select Internet workstation installation.
- Type
your login credentials in the Please enter your credentials
section.
- Click Authenticate
to validate your credentials. If the validation fails, for example, due to
an incorrect web site, user name or password, an error message will be
displayed. If the validation is successful, the Please enter your
credentials section will be disabled, and the Release field in
the Installation section will automatically refresh and display the
highest allowed product update or service pack that you can download.
- Click OK.
Update network
installation
- Create
a backup of your companies.
- Check
the release notes and system requirements of the product update that you
want to install.
- Open
the installation folder of the Exact Globe+ network installation on the
server.
- Click NETUPDATE.EXE.
- At Install
mode, select Internet network installation update.
- Type
your login credentials in the Please enter your credentials
section.
- Click Authenticate
to validate your credentials. If the validation fails, for example, due to
an incorrect web site, user name or password, an error message will be
displayed. If the validation is successful, the Please enter your
credentials section will be disabled, and the Release field in
the Installation section will automatically refresh and display the
highest allowed product update or service pack that you can download.
- Click OK.
- Once
the installation on the server is done, you can start Exact Globe+ on the
workstations. When starting Exact Globe+ on the workstations, these
installations will automatically be updated to the new product update.
Triggering the Exact Globe+ license migration
When you open a company for the first time in Exact Globe+, this
action triggers the license migration to Exact Globe+. You can postpone this migration up to a maximum of four
times. After the fourth time, you must migrate the license.
If you postpone the migration, a reminder will be displayed
after seven days. During the seven days, you cannot trigger the license
migration. If you update the license through the standard license portal
functionality in Exact Globe+, the updated license will not trigger the
migration.
However,
if the migration has to be done at a specific time, it must be done based on
the following steps:
- Create a new and empty company with the current
license.
- When you open the empty company, the license
migration will be triggered.
- Carry out the license migration.
- If the license migration is successful, you can
delete the empty company.
- Open
the existing company and update the license through the standard license update
procedure.
| Main Category: |
Attachments & notes |
Document Type: |
Online help main |
| Category: |
|
Security level: |
All - 0 |
| Sub category: |
|
Document ID: |
30.167.362 |
| Assortment: |
Exact Globe+
|
Date: |
01-03-2023 |
| Release: |
|
Attachment: |
|
| Disclaimer |