How-to: Extending Word Merge schemas
Introduction
Exact Word Merge now allows you the flexibility to create additional entities and fields for the metadata and schemas used in generating Word Merge templates. This document will guide you on how to add entities and fields to metadata and schemas.
To merge any template, the Word Merge engine requires a series of information to be able to read information from the Exact Synergy Enterprise database. A template contains merge fields which come from a schema. A Word Merge schema contains all available fields to be used in a template. By using these fields in the template, the Word Merge engine will find their equivalent fields in the metadata. The metadata contains the actual field name and table information of that field, and by using these information, Word Merge creates a specific query for each template (based on the fields used) to retrieve the data and merge the template.
Therefore, if you want to modify or extend Word Merge fields, you need to modify both the metadata and schema files. Throughout this document, the Person entity will be used and extended for all the examples and explanations.
Note: All text values, attributes, and element names in the XML files are case-sensitive. However, table and column names are not case-sensitive.
Prerequisites
The following requirements must be met to create additional entities and fields for metadata and schemas:
Return to the top
How do I create metadata?
In Exact Synergy Enterprise, the schema is based on a metadata file named MailMergeTags.xml. This XML file contains following elements:
|
Attribute
|
Description
|
|
Entity
|
|
|
Field
|
Represents a column in the entity.
|
|
Join
|
Represents a join within the entity or other entities.
|
Note: It is mandatory for the new metadata to follow the format of the default metadata file MailMergeTags.xml.
The following is the step–by-step guide to add new metadata to the existing metadata in Exact Synergy Enterprise.
a. Creating XML files for metadata
- In the text or XML editor, instantiate a metadata structure by inserting the <eExact> tag and <Entities> tag as shown in the following:
<eExact>
<Entities>
</Entities>
</eExact>
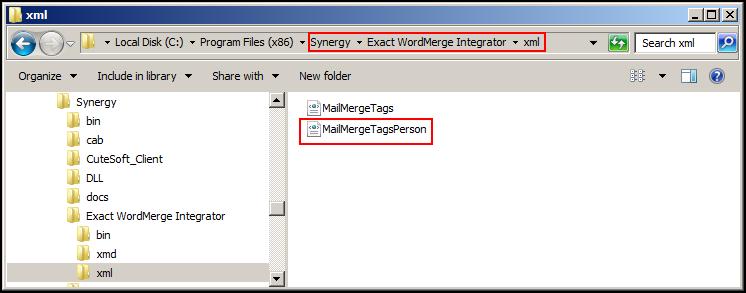
- Save the file in the XML format in the xml folder with a file name that begins with the prefix MailMergeTags, such as MailMergeTags_Accounts.xml or MailMergeTagsPerson.xml. You need to save this file in the xml folder in which you have installed Exact Word Merge Integrator (usually this folder is stored within the Synergy folder where Exact Synergy Enterprise is installed). The final location address should look like: “C:\Synergy\Exact WordMerge Integrator\XML\”.
Keep in mind: This is mandatory as the merging process acknowledges only the file with the prefix name of “MailMergeTags*.xml” residing within the default folder where the general metadata file is stored.
In this section, the XML file created for the metadata will be saved as MailMergeTagsPerson.xml.
b. Creating
XML files for metadata - for Exact Word Merge in Exact Lightweight Integration Server (ELIS)
- In the text or XML editor, instantiate a metadata structure by inserting the <eExact> tag and <Entities> tag as shown in the following:
<eExact>
<Entities>
</Entities>
</eExact>
- Save the file in the XML format in the xml folder with a file name that begins with the prefix MailMergeTags, such as MailMergeTags_Accounts.xml or MailMergeTagsPerson.xml. You need to save this file in the xml
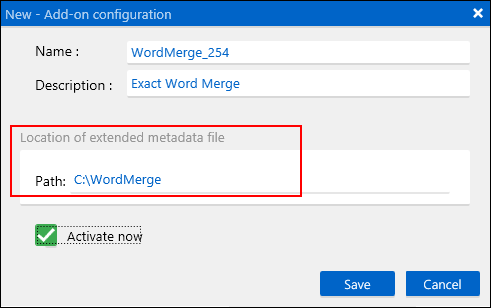
folder in the same location as the extended metadata file. The location of the
extended metadata file is defined
at Path when setting up the Exact Word Merge Integrator. For
more information, see How-to: Setting up Exact Word Merge Integrator in Exact Lightweight Integration Server (ELIS).
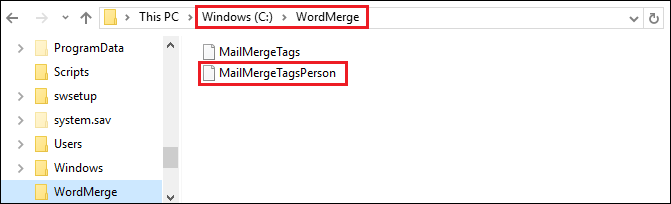
From the following example, the location will be C:\WordMerge:
Keep in mind: This is mandatory as the merging process acknowledges only the file with the prefix name of “MailMergeTags*.xml” residing within the default folder where the general metadata file is stored.
In this section, the XML file created for the metadata will be saved as
MailMergeTagsPerson.xml.
c. Adding new or extend existing entities
-
Open the MailMergeTagsPerson.xml file from the text or XML editor.
-
Insert the <
Entity> tag within the <
Entities> tag and define the values of the attributes for the entity.
For example, if you are extending the
Person entity, your XML should look like the following:
<eExact>
<Entities>
<Entity name="Person" tableName="humres" keyField="res_id">
</Entity>
</Entities>
</eExact>
If the entity name exists in the master metadata (MailMergeTag.xml) of which you are extending, the Word Merge engine will be able to detect this and add your changes to the existing entity. If the entity name does not exist in the master metadata, you are adding a new entity.
The following is the reference table for the <Entity> tag and the descriptions of its available attributes:
|
Attribute
|
Description
|
|
name
|
The unique name of the entity, which is used in the schemas, metadata, joins, and other references.
|
|
tableName
|
The actual name of the table in the database where this entity points to.
|
|
keyField
|
The primary key (unique identifier) of the table, which reflects what is defined in the repository.
|
-
To specify the column to be used, insert the <
Fields> tag within the <
Entity> tag. For each column, add a <
Field> tag within the <
Fields> tag and define the values of the attributes for the field, as shown in the following example:
<eExact>
<Entities>
<Entity name="Person" tableName="humres" keyField="res_id">
<Fields>
<Field name="SkypeID" fieldName="SkypeID" />
<Filed name="MSN" fieldName="MsnID" />
</Fields>
</Entity>
</Entities>
</eExact>
The following is the reference table for the <Field> tag and the descriptions of its available attributes:
|
Attribute
|
Description
|
|
name
|
The unique name of the field, which is used in the schemas, metadata, joins, and other references.
|
|
fieldName
|
The actual name of the column in the database where this field points to.
|
|
sql
|
Retrieves the value of the field from the SQL statement or SQL function execution.
Note:
-
The “{0}.” prefix must be used in the SQL statements when accessing any column from the current entity, such as “SELECT oms60_0 FROM Land WHERE landcode = {0}.cmp_fctry”.
-
The fieldName attribute should be not filled when using the sql attribute.
|
|
patchType
|
Transforms the final value of the field. Currently, the attribute supports four (4) modes:
-
Term: Returns the value according to a term ID. For example, patchType=“1”.
-
Format number: Returns the output in a numeric format. For example, patchType=“2,2”. The first number in the patch mode indicates the number formatting. The second number in the patch mode indicates the decimal points in the output number.
-
Format date time: Returns a specified output in the date format according to the Exact Synergy Enterprise setting for the time format and format option after the patch mode. For example, patchType= “3,2” refers to the short date format and patchType= “3,7” to the long date format. “0” for date and time, “4” for short time, “5” for date time seconds, “6” for date time milliseconds, “7” for long date time, “9” for day month, and “10” for day long date.
-
Format yes\no: Returns the output according to the value “1” for “Yes” and “0” for “No”, which is then translated into the template language. For example, patchType=“4”.
|
|
exclude
|
This field is for internal use only, and its value does not affect the merge result.
|
In another example, by adding the following lines in XML, you will add two new entities to the metadata:
<eExact>
<Entities>
<Entity name="HrSkills" tableName="hrsk" keyField="ID">
<Fields>
<Field name="Res_ID" fieldName="res_id" />
<Field name="Description" fieldName="skill_type" />
</Fields>
</Entity>
<Entity name="HrRoles" tableName="hrroles" keyField="ID">
<Fields>
<Field name="Res_ID" fieldName="EmpID" />
<Field name="Level" sql="(SELECT Description FROM HRRoleLevels WHERE ID = {0}.RoleLevel)" />
<Field name="Role" sql="(SELECT Description FROM HRRoleDefs WHERE ID = {0}.RoleID)" />
</Fields>
</Entity>
</Entities>
</eExact>
These two new entities are HrSkills and HrRoles. These are later used in this document to join them to the Person entity. As shown, the combination of the field name and sql attributes is used for each entity.
- To join or refer an entity to another, insert the <Joins> tag within the <Entity> tag. For each join, add a <Join> tag within the <Joins> tag and define the values of the attributes for the join, as shown in the following example:
<Entity name="Person" tableName="humres" keyField="res_id">
<Joins>
<Join name="Skills" lookUpEntity="HrSkills" lookUpJoinType="left" fieldName="res_id" lookUpKey="Res_ID" />
<Join name="Roles" lookUpEntity="HrRoles" lookUpJoinType="left" fieldName="res_id" lookUpKey="Res_ID" />
</Joins>
</Entity>
The following is the reference table for the <Joins> tag and the descriptions of its available attributes:
|
Attribute
|
Description
|
|
name
|
A unique join name which will be used in schemas (a join name must be unique in the scope of its parent entity, and its name cannot be the same as another field name).
|
|
lookUpEntity
|
The entity name which is referenced to the parent entity.
|
|
lookUpJoinType
|
This field indicates the type of join, its values are limited to inner, left, right, and full.
|
|
fieldName
|
The actual column name in the current entity, which is a foreign key for this join.
|
|
lookUpKey
|
The name of another field in the reference entity on which the join is to be created.
|
Note: A new entity must be joined by at least one of the existing fixed entities (Person, Contact, Account, Quotation, Project, or Request, except PlaceHolders). Otherwise, it cannot be used in the schema. There are more advanced ways to create joins, but only the most common join is described in this document.
- Save your XML file.
Return to the top
How do I create repeating lines?
Joins connect two entities together. However, if the child table contains more than one record for the parent record, the information will be repeated. Each person can have multiple skills and several roles, such Skills and Roles. To avoid repeating data and to be able to create a template that understands and use this repeated data, you can mark any join as a repeating join.
For example, if the <Repeating> tag is added to the previous example, your metadata should look like the following:
<Entity name="Person" tableName="humres" keyField="res_id">
<Joins>
<Join name="Skills" lookUpEntity="HrSkills" lookUpJoinType="left" fieldName="res_id" lookUpKey="Res_ID" Repeating="yes" />
<Join name="Roles" lookUpEntity="HrRoles" lookUpJoinType="left" fieldName="res_id" lookUpKey="Res_ID" Repeating="yes" />
</Joins>
</Entity>
Note: It is possible to create a repeating line template for Skills and Roles, similar to quotation lines. For more information, see Creating Word Merge templates for quotations with repeating lines.
Return to the top
How do I create schemas?
Once the metadata has been created and updated, it can be updated to the schema. The default schema is also an XML file with the file name of WordMergeSchema.General.xml and is located in the xml folder where you have installed Exact Synergy Enterprise. It is better to create another schema rather than edit an existing one, as the file will be overwritten when Exact Synergy Enterprise is updated.
By following the examples in this document, you would have created two entities (HrRoles and HrSkills) and extended an existing entity Person. Your metadata should look like the following:
<eExact>
<Entities>
<Entity name="HrSkills" tableName="hrsk" keyField="ID">
<Fields>
<Field name="Res_ID" fieldName="res_id" />
<Field name="Description" fieldName="skill_type" />
</Fields>
</Entity>
<Entity name="HrRoles" tableName="hrroles" keyField="ID">
<Fields>
<Field name="Res_ID" fieldName="EmpID" />
<Field name="Level" sql="(SELECT Description FROM HRRoleLevels WHERE ID = {0}.RoleLevel)" />
<Field name="Role" sql="(SELECT Description FROM HRRoleDefs WHERE ID = {0}.RoleID)" />
</Fields>
</Entity>
<Entity name="Person" tableName="humres" keyField="res_id">
<Fields>
<Field name="SkypeID" fieldName="SkypeID" />
<Field name="MSN" fieldName="MsnID" />
</Fields>
<Joins>
<Join name="Skills" lookUpEntity="HrSkills" lookUpJoinType="left" fieldName="res_id" lookUpKey="Res_ID"
Repeating="yes" />
<Join name="Roles" lookUpEntity="HrRoles" lookUpJoinType="left" fieldName="res_id" lookUpKey="Res_ID"
Repeating="yes" />
</Joins>
</Entity>
</Entities>
</eExact>
To use these new fields and create a template based on them, a schema for this metadata must be created.
Note: It is important to note the only seven entities, namely Account, Contact, Person, Request, Project, Quotation, and PlaceHolders are shown as the main entities (folders) in the schema. You can join any entity to all these main entities except to PlaceHolders. The other entities are displayed as nested subfolders according to their joins with the main entities.
a. Creating XML files for schema
- In the text or XML editor, insert the <eExact> tag and give a name to the namespace. This namespace will be used by Microsoft Word when you import it in a document.
<eExact xmlns="New Schema">
</eExact>
-
Save it as an XML file. Give this file any name and save the file to the location you require. In this section, the file will be saved as Exact_MySchema.xml.
b. Creating schemas for new entities
A schema has a very simple structure. It starts with a root tag <eExact> and continues with the name of the main entities.
- Firstly, indicate which main entity you are changing. In this document, the Person entity will be changed. Therefore, this must be added into the schema:
<eExact xmlns="New Schema">
<Person>
</Person>
</eExact>
- Each tag represents an entity or a field. If you have added a new entity or field for Person, your schema should look like the following:
<eExact xmlns="New Schema">
<Person>
<[Field Name]>[TEXT]</[Field Name]>
<SkypeID>Skype ID</SkypeID>
<MSN>MSN ID</MSN>
</Person>
</eExact>
The SkypeID and MSN are the field names which have been added to the Person entity.
- Next, add new joins to the Person entity. To add new joins, add new elements under the Person entity. In this case, the Roles and Skills joins are added:
<eExact xmlns="New Schema">
<Person>
<SkypeID>Skype ID</SkypeID>
<MSN>MSN ID</MSN>
<Roles>
</Roles>
<Skills>
</Skills>
</Person>
</eExact>
- To add new entity fields into a schema, add them accordingly based on their entities, in this case, the Level, Role, and Description. You can skip the fields which you do not want to use in the schema (like the foreign keys):
<eExact xmlns="New Schema">
<Person>
<SkypeID>Skype ID</SkypeID>
<MSN>MSN ID</MSN>
<Roles>
<Level>Level</Level>
<Role>Role Name</Role>
</Roles>
<Skills>
<Description>Description</Description>
</Skills>
</Person>
</eExact>
- Save your schema.
When you have saved the schema, you can use it to create your template. Open the schema in Microsoft Word. For more information, see Creating Word Merge templates from Word Merge schemas.
Your schema should look like the following example:
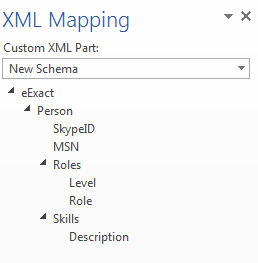
The following example shows how you can transform your metadata to a schema easily:

Return to the top
Related documents
| Main Category: |
Support Product Know How |
Document Type: |
Online help main |
| Category: |
On-line help files |
Security level: |
All - 0 |
| Sub category: |
Details |
Document ID: |
23.684.908 |
| Assortment: |
Exact Synergy Enterprise
|
Date: |
01-10-2016 |
| Release: |
|
Attachment: |
|
| Disclaimer |